Internet Explorer
Internet Explorer is not supported. Please upgrade to a more modern browser.
Rules
No swearing/cussing, improper language, or mature topics
Autcraft has many younger players so chat must be kept family-friendly at all times. The following list includes a few examples of topics that ARE NOT ALLOWED, but it is not an extensive list. If a staff member asks you to stop saying something, please stop immediately.
Game Play Guidelines
The following are not allowed and may result in punishment:
Protections
Autcraft protects the builds of players to prevent others from damaging them, the following guidelines must apply to all builds in order to be protected:
No Griefing
Griefing refers to the intentional, unapproved editing or damaging of another player’s property. This is not acceptable behavior for any reason. To report griefing, please type “/modreq I was griefed” and a staff member will assist you.
Griefing is:
Family Friendly Builds Only
We hope that everyone on Autcraft uses good judgment about building things appropriate for use in minecraft on a family friendly server. If while exploring you find an inappropriate build, please type '/modreq inappropriate build' while standing nearby. An admin will take a look as soon as possible and remove it if necessary.
We will remove builds that we deem inappropriate, including but not limited to: Any symbol, emblem, or shape that represents an intolerant or hateful group. Any representation of male or female private body part(s). Any swearing or hateful words spelled out with blocks, on signs, or in books.
Please do not build "adults only" establishments, including casinos, bars, and nightclubs. References to alcohol or drugs in builds or item names are not allowed on Autcraft.
Skins and Banners
If your skin or banner is used with intent to scare, annoy, harass, or impose a view or position on to other players, a helper or admin may ask you to change your skin and/or remove the banner before returning to gameplay. Skins and Banners need to be family-friendly including but not limited to:
One Account Per Player
Alternative and shared accounts are not allowed for any reason on Autcraft. Alternative accounts will be removed from the white-list and shared accounts will be handled accordingly by staff.
Trapping/Killing Players
The intentional trapping or killing of a player on Autcraft will not be tolerated. Traps will be removed and the player responsible will be punished accordingly.
Public Builds
If you decide to make a build for community use, it is your responsibility to maintain it. Public builds will be protected following the previously mentioned Protection Guidelines.
Redstone
Staff reserves the right to request any build be removed if it is too demanding of the server. All redstone builds MUST abide by the following:
Pet Ownership
As a large survival server with hundreds of different players on each day, we must limit the number of pets each player can have in order to reduce lag. The follow limits have been set for the benefit of the entire server.
You are allowed to have 10 of each animal type with the following exceptions:
These limits are per loaded area. A loaded area is defined by a radius of 10 chunks around any player location. We recommend spacing large groups of mobs at least 20 chunks apart to prevent them from being loaded at the same time.
Sheep and wolf limits are to allow two of each variety, however you are welcome to mix and match however you choose, including having all the same color, as long as they remain within the stated limit.
There are more than 15 villager occupations. This means that if you want to have a villager trading area for books or materials, you must have separate areas to ensure no more than 15 villagers are loaded at any one time.
Tamed animals:
Chat Guidelines
No Cheating/Hacking
No Spam
Sometimes chat is going really fast! It is okay to say it again later if you feel no one heard you but you don’t need to say it a lot of times in a row.
No Harassment
You should not, in any way, harass, annoy, bully, or otherwise inconvenience any players. This includes name-calling and other forms of insulting others. If somebody asks you to stop something, please do so immediately. Harassment or bullying of any kind will not be tolerated on any Autcraft platform.
No Personal Information
Privacy and security are of the utmost importance to us here at Autcraft. Because of this, seeking out personal information of other players is strictly forbidden and will be handled accordingly. Please consult this general guide on internet safety for guidelines and advice.
English Only
We understand that English might not be your first language, but Autcraft is an English speaking server only. We will help you in any way that we can, but we ask that all communication on Autcraft platforms are in English.
No Advertising
There will be no advertising of any other servers in any form. No talking about other servers, discords, games, etc. on any Autcraft platforms.
Changing Usernames
Usernames should not:
You will be removed from the whitelist until you change your name back.
Roleplay Reminders
We know some of our players have active imaginations and are fantastic storytellers. Chat channels are available for any players who want to participate in extended roleplays. All roleplay chat needs to be contained in a channel and need to follow all of AC's Chat Guidelines. Sr. Helpers and Admins monitor all chat channels.
Forum Rules
Consequences
On Autcraft we try to be fair and understanding. We have several tools to help us maintain a safe and family-friendly environment. What tool is used is at the discretion of the staff member online at the time. In most situations, there will be one or more verbal warnings in public and/or private messages.
If you or your child experiences any of these consequences, you can contact any staff member in game via private chat, /helpop, or the Facebook page. Please include the player’s username when inquiring via email or Facebook. We advise all parents to frequently check the emails provided in the whitelist application for updates concerning the player.
Mute
Mutes prevent the players from speaking in chat or channels and are generally reserved for chat violations. You will usually be messaged concerning why you were muted and can often respond via a book or signs. Admins can also be contacted with /helpop.
Jail
Jail is a room that players cannot leave or interact with other players. Jail is typically, but not exclusively, reserved for violations of gameplay rules. Players may be held there until staff can contact their parent or guardian.
Ban
In extreme cases, players who repeatedly make poor choices will be temporarily unable to access the Autcraft server. The timeframe is at the discretion of the admins, however, some players will remain banned until their parents can be contacted to help us help the player better understands the rules.
Whitelist Removal
Rarely, but sometimes, players are removed from the whitelist and given a chance in the future to apply again. This is used for players who are continually destructive or show signs that they are not ready to participate in a multiplayer server.
Note to Players
This is not an extensive list of the rules and behaviors expected of Autcraft players. If a staff member asks you to stop a certain behavior, you are expected to respect their request. If you disagree with a staff member or their request, you should contact an admin via private message, do not argue with staff members.
The Autcraft Store is where players can buy ranks, permissions, and other items to enhance game play. To access the store, visit click here, or click the "Store" tab on our website menu.
Items can be purchased using real money, or with credits. Players can earn credits by signing up for in game jobs and then converting earned job points to store credit.
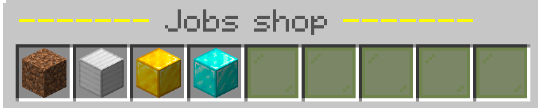
Players can have up to three jobs at a time. Visit /warp jobs to see available jobs and their descriptions. After choosing jobs, simply do activities that earn points. For example, Miner job gives points for mining stone, ores, deepslate, and other blocks. Choosing activities that are enjoyed and frequently done while playing Minecraft will make earning points quick and easy.
IMPORTANT Players must have registered at Autcraft.com beginning April 2022 or later before converting any job points. If you have not updated registration to our new website, your job points will be lost during conversion.
When a player is ready to use their job points, they can convert the points into credits with the command /jobs shop
The blocks on the shop GUI represent the increments of points that can be converted into credits. Hovering over each block will provide the conversion information. Players must have a free inventory space in order to convert points.
Note: These blocks do not represent ranks or any other item. They are only placeholders for the conversion options.
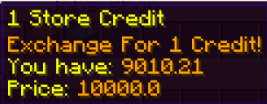
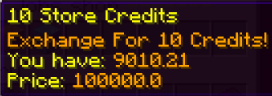
Dirt Conversion - 10,000 job points = 1 store credit
Iron Conversion - 100,000 job points = 10 store credits
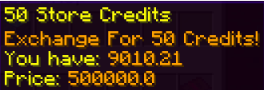
Gold Conversion - 500,000 = 50 store credits
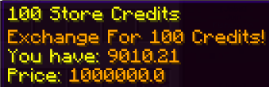
Diamond Conversion - 1,000,000 job points = 100 store credits
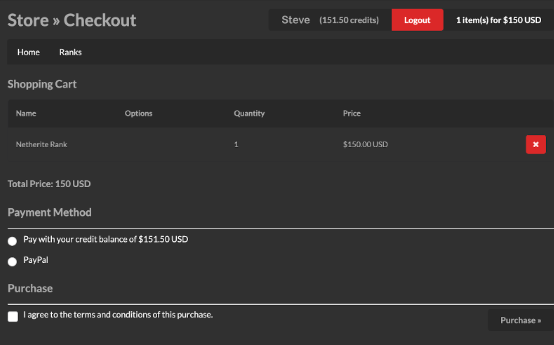
After points have been converted to credits, players can visit the store by clicking the link on the menu bar at the top of our website. Please make sure that there is enough inventory space in the game for the player to receive the items purchased.
![]()
Items are added to the store manually. As our store is newly opened, please be patient during the process. As of the most recent update of this page, only Ranks are available for purchase. Other items will be added.
Select the category of the desired item. At this stage, there will be a field to enter the username of the player the item will be sent to. This can be you, or it can be a different name if you wish to donate a rank to another player.
Note: The store no longer displays your current balance until you get to the checkout page.

For information about each item, click "Buy"

A description of the item will pop up. To continue with the purchase, choose "Buy"
On the checkout page, there is an option to use the available credit balance, or pay with real money through PayPal. Make sure to check the box at the bottom agreeing to terms and conditions of the purchase. To finalize this sale, click "Purchase."
Mods are modifications to the Minecraft game that make it behave differently. Sometimes they're small, like a minor graphical change; sometimes they're big, like adding new blocks and items; and sometimes they're unfair, like x-ray. In an effort to ensure that Autcraft is a safe and fair place to play, where everyone has similar experiences and opportunities, only some mods are allowed.
This is a list of all of the mods currently allowed to be used on the Autcraft server. If a mod you want to use is on this list, please read the entire section for that mod so that you can see if there are any parts of that mod that are disallowed. If there is a mod that you want to use that is not on this list, please see if it has been suggested before and if not, suggest it on the forums and don't use it unless it is put on this list.
Note: If a mod on this list requires another mod to work, that mod is also allowed.
Most mods use either the Fabric/Quilt or Forge mod loader. To use a mod, you'll usually have to install a mod loader first.
Quilt is a fork of Fabric, compatible with most Fabric mods (though that's one-directional compatibility - Fabric cannot load Quilt mods). The QuiltMC website has installation instructions if you want to use Quilt.
forge-<minecraft_version>-<forge_version>-installer.jar.A word of safety: NEVER download mods or mod loaders from websites you don't trust! At best, this can lead to installing malware and viruses; at worst, you can lose your Minecraft account. For your safety (and everyone else's), only download mods from the websites listed below unless you are sure you know what you're doing.
OptiFine is likely the most popular and most downloaded mod for Minecraft. It's been around since Minecraft Beta 1.7.3, and was originally a great mod with many optimisations, features, and quality of life improvements. However, in recent years, it's benefits have dwindled and causes many incompatibilities with other mods due to it replacing large amounts of code and being closed-source. In the modern Minecraft modding era, with the Fabric/Quilt mod loader and community, open-source mods exist to replace most of OptiFine's features. Other mods that optimise the game more than OptiFine exist too, and they work in a way that's more compatible with other mods.
It's not recommended to use OptiFine anymore, but it is allowed as long as Options -> Video Settings -> Performance -> Fast Math is set to OFF (reason why here). OptiFabric is a mod which allows you to use OptiFine on the Fabric mod loader (it isn't supported natively), and is also allowed, though not recommended.
OptiFine_<minecraft_version>_HD_U_<letter><number>.jar.Despite being a simple-looking block game, Minecraft can actually be quite difficult to run because it is incredibly unoptimised. Luckily, the community have recognised this and created mods to help. These mods don't affect gameplay, and exist to improve performance, and so are okay to use on the server.
Note: Any performance enhancing mod that does not affect gameplay is approved to use on Autcraft. See examples below. If you have a question about if a mod is okay, please ask on the suggestions forum.
While OptiFine is not recommended to be used, you can still use most of its features by using a mod from this list that adds the feature you want to use.
Note: Any mod with the sole purpose of allowing controller use in Minecraft is approved. Any non-vanilla features, such as reach-around, must be disabled. If you have questions about a specific mod, please ask in the suggestions forum.
Client-Specific Mods
We do not have the time to review every possible mod or client, however as needed, we will sometimes review third party client mod lists to ensure players continue to play fairly on Autcraft. Any pre-installed mods that are already on our approved mods list are automatically approved for use with third party clients. Most "mods" that are included with these clients function as resource packs or are changes easily accessible through vanilla Minecraft options. If you use a third party client and do not see a mod that you are interested included on this list, please ask for approval before using. Make sure to scroll up and check that it is not already listed as an approved mod. The following list includes currently approved third party client mods.
Note: Replay Mod is not allowed on Autcraft and must be disabled.
Any mod that allows voice chat or communication outside of Autcraft is strictly prohibited.
*asterisk means the mods is a recent addition.
Augmentative and Alternative Communication, or AAC, refers to any form of communications besides talking. Augmentative means to add, while alternative means to be used in place of something. AAC can be as simple as using facial expressions, drawing pictures, using hand gestures, or pointing to pictures and words. It can also be special programs on tablets or using a computer to speak for you.
Autcraft's AAC

Our AAC plugin utilizes Minecraft items that represent helpful phrases. A list of current options is at the bottom of this page. If there are additional options that you would like to see included, please make a post on our suggestions forum.
To open the ACC GUI, type /acc get
Open the green book to view the options.
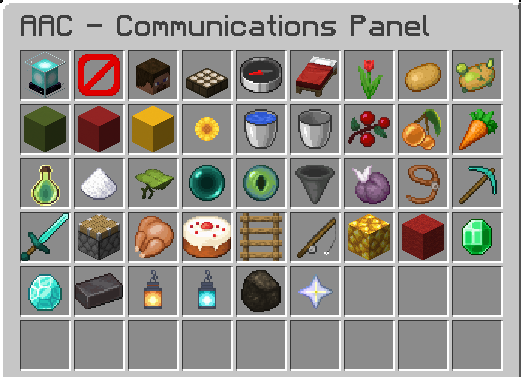
Hovering over any of the displayed images will pop up a word or short phrase.
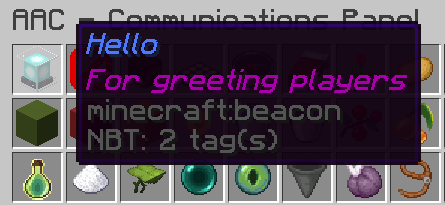
Clicking an item will immediately send the attached word or phrase into chat.
Current Options
This list will be updated as more options are added to our AAC. The list is current as of 26, March, 2024
Tour Guide
Description
Players who log into Autcraft for the first time should always be offered a tour. This guide provides helpful information on the areas to show each player and some simple wording for each area. Please always offer a personal guided tour. The tour coaster has been created for when there is no one available to give a tour so the new player can still get started. https://www.autcraft.com/forum/topic/204-tour-guide/
For a simpler version of this guide, please visit the Tour Guide forum.
Who Can Give Tours
Any player can give a tour! Please explore Spawn to learn where things area. Review the basic rules of Autcraft so you can answer questions. Don't be afraid to ask for help if you don't know the answer to a question. Ask to shadow a tour led by an experienced tour giver, such as a Helper or Buddy.
Tour Behavior
Areas to Cover
Optional Areas to Cover
These are other important areas to show new players, but they are not required if the new player seems bored or in a hurry to get to playing.
But There is So Much More To See!
Less is More. Too much information makes it hard to remember it all. Stick to the important places and leave the rest for the new player to discover as they play.
I'm Not Giving a Tour. How Can I Help?
The New Player is in a Hurry to Get Started! What is the Shortest Tour I Can Give?
Wording Suggestions (great to copy/past into chat!)
Other Useful Information
If you are giving a tour with more than one tour guide, take turns sharing information and explaining areas. An easy way to do this is one person explains the portal room. The next person explains the jobs area, and so on.
Please try to keep the tour brief. New players are eager to start playing. Show them what they need to know to get started and help them get playing as soon as possible. A complete tour can take as little as 10 minutes.
Description
Staying safe online includes protecting your mental health. There are tools available to help us avoid unnecessary stress from online bullying, harassment, general annoyance, and an over-connection to social media. Knowing how to ignore and block specific players, adjusting notification settings, and having a way to contact admins in an emergency will greatly improve your online experience.
Autcraft
Ignore
If a player is bothering you, you have the option to stop their messages from appearing on your screen with the command /ignore <player name>.
Example: /ignore username1
You can keep the player ignored forever, or for a short amount of time to take a break.
To stop ignoring a player, use /unignore <player name>
Teleporting
We always have the option to deny teleport requests with /tpdeny or /tpno but if you have Patreon rank you can also set all requests to automatically deny with the command /tptoggle
HelpOP
Another very important command to know is /helpop <message>
This is only to be used in emergency situations when there are no staff members online.
Always check Tab to make sure there are no Helpers, Sr. Helpers, or Admins online before using this command.
/helpop can be use used to immediately contact staff to alert serious situations, such as:
Do Not use /helpop for anything that can wait, such as a question for AutismFather, or to check on a modreq.
Discord
Reminder: You must be 13+ to have a discord account. For more information about this, read about COPPA on this page.
Safe Account Practices
On Discord, you get to choose the friends and communities you talk with. A key part of making this happen is knowing how you can set up your account.
For more information, visit Four Steps to a Super Safe Account.
Notifications
You are able to control notifications for entire Discord servers, as well as individual channels. To adjust settings for an entire server, head to that page and click the arrow next to the server name. Select Notification Settings and choose the options that fit your needs.
For thread notifications, visit the thread you wish to make changes to, and click the bell icon at the top. Here you have the option to temporarily mute the thread if you need to take a break, or you can choose a long term option.
Discord Safety Guide
Please visit Discord's Safety guide and read through everything to be sure that you are using the service as safely as possible.
YouTube
Managing Comments/Blocking Users
Follow this link for directions on how to block someone from commenting on your videos and livestreams
How to hold comments from review and block specific words can be found here
YouTube also offers the ability to block other viewers in live chats on streams you are watching
Safety Information
Safety Tips from YouTube
Staying Safe as a Teen Content Creator
Notifications
YouTube Notification Settings
Twitch
Managing Viewers/Blocking Users
In your account settings, under Security and Privacy there are options to:
Notifications
You also have the ability to update your notification settings
Legal Information
COPPA
The Children’s Online Privacy Protection Act has been Federal law since 1998. It exists to restrict how websites, apps, and other online groups can collect and use children’s data. Due to these restrictions, many apps and websites do not allow children under 13 years of age to create accounts. If they are found to knowingly allow underage children to use their services, steep fines may be imposed, which have reached millions of dollars in past cases. This is why so many websites and other online services have a minimum age requirement of 13.
Autcraft History
Description
Autcraft was created on June 23, 2013, in response to autism parents online searching for a safe place for their children to play without fear of bullying, teasing or harassment. Stuart Duncan created an autism blog titled Autism From a Father's Point of View in May 2010 and and got to know many people throughout the autism community.
Autcraft's original logo with the first Lodge at Spawn 1
Creation
As the popularity of Minecraft grew, he began to notice more and more parents of autistic children reaching out to one another in hopes that their children could play apart from the public servers where bullying ran rampant. Witnessing this for several months, Stuart Duncan felt like he could help. From a modest $2.50 investment, Autcraft was born.
Reception
From just a simple Facebook post going out exclusively to friends, not publicly, the reach went viral within the autism community as word spread from autism parent to autism parent. Stuart was quoted as saying "within 2 days, I had received over 750 emails."
Within 48 hours of announcing the launch of the server, Stuart Duncan's ISP (Internet Service Provider) disabled his access to their email server citing the reason being that the traffic volume of emails resembled that of a business and was not allowed for a residential account.
Within 8 days of the server's launch, the price of renting the server hardware went from $2.50/m to $85/m having upgraded 8 times from the bottom tier package to the top tier.
Currently, the server has over 20,000 players on the whitelist with an average of 1,200 unique players on the server each month.
AutismFather
Bio
Stuart Duncan is the founder and owner of Autcraft, the first Minecraft server exclusively for children with autism and their families. He is also the creator of Autism From A Father's Point of View, one of the first and few blogs discussing autism by a father. His oldest son (Cameron) has autism while his younger son (Tyler) does not. Stuart is a work from home web developer with a background in radio. He does his best to stay educated and do whatever is necessary to ensure that his children have the tools they need to thrive. He shares his stories and experiences in an effort to further grow and strengthen the online Autism community and to promote Autism Understanding and Acceptance.
AutismFather currently has the rank of Admin.
Family
Things to Know
On The Internet
Description
This list includes some, but not all, of the abbreviations used on Autcraft
Abbreviations
Description
Ranks are used to show which players have various permissions in Autcraft. Ranks are also used to designate who is a staff member.
Autcrafter - Free! Everyone Starts Here
Iron - $10.00 USD | 10 Credits | 100,000 Job Points
Gold - $25.00 USD | 25 Credits | 250,000 Job Points
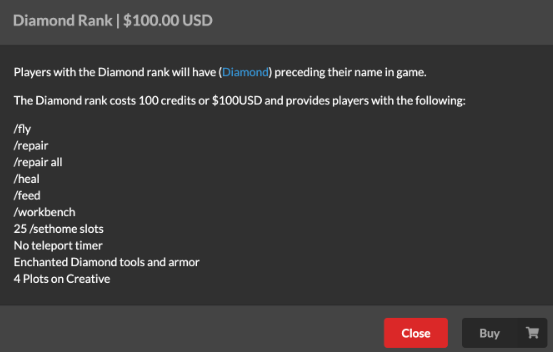
Diamond - $50.00 USD | 50 Credits | 500,000 Job Points
Netherite - $75.00 USD | 75 Credits | 750,000 Job Points
Patreon - $10.00 or more per month at Patreon.com
Read more about Patreon rank here
All players have access to two plots on Autcraft Creative. Players who help to support the server by becoming a Patron are given two bonus plots, for a total of 4 creative plots.
Description
Patreon is a website where people can pledge monetary support for Autcraft. Your support is how Autcraft is able to stay online. Anyone who pledges to support the server at the $10 per month level or more will receive their name on a sign at spawn as well as Patreon rank in game which provides the following perks:
Perks
For more information about how to join Patreon and support Autcraft, visit Patreon
Note: The Patreon Monument is updated manually and it may take time for your name to be added.
Description
YouTube Rank is a rank on Autcraft given to players who have qualifying YouTube or Twitch pages and wish to promote their videos or livestreams in chat.
How do I get YouTube Rank?
To get YouTube rank you have to have done:
Will I get the YouTube tag on Autcraft.com?
Yes
Will I get the YouTube Rank on the Autcraft Server?
Yes, an Admin will give you the Rank.
Do I get more commands with YouTube Rank?
No, the rank just shows that you do YouTube and allows you to post links to your YouTube channel, your videos, and your livestreams, in chat.
Where can I apply?
You can apply >Here<
Cost: $75.00 USD | 75 Credits | 750,000 Job Points
Cost - $50.00 USD | 50 Credits | 500,000 Job Points
Cost - $25.00 USD | 25 Credits | 250,000 Job Points
Cost - $10.00 USD | 10 Credits | 100,000 Job Points
Description
Autcrafter is the first rank a player receives when joining Autcraft.
Commands
Description
Here you will find some commands you can do as an Autcrafter. Commands with multiple options will also have their own dedicated pages.
/ach - A command that uses various subcommands, and typing it will show a few of the main AC commands that are able to be used.
/afk - It will show up in chat and in tab that you are AFK (Away From Keyboard) but it is generally used as a term for being idle. You will be kicked after 15 minutes of being idle unless you are a Helper+
/autcraft - It's the same as /ach
/autcrafthelper - The same as /ach & /autcraft
/back - Will teleport you to the previous location you were at.
/bal - Shows your balance of money.
/balance - Same as /bal
/birthday <day> <month> - Set your birthday. For example June 23 is entered as 23 6
/bungee - Will show what BungeeCord Version we're running.
/chan - Will show different subcommands to use with /chan.
/channel - Same as /chan.
/chat - Doing /chat <message> will just send the message in chat, it is a way that people in channels send messages outside of the channel,
mostly used by Staff talking to people inside and outside of a channel.
/comment <status number> - Used to comment on modreqs.
/compass - Shows precisely what direction you're facing.
/coords - Shows what world you are in, what coordinates you are at, which way you are rotated and your head angle.
/craft - Allows you to open the crafting bench if you have Iron Rank+.
/credits - Displays the amount of store credits you have
/delhome <home name> - Allows you to delete one of your sethomes.
/done <status number> - Allows you to close one of your modreqs.
/eat - Refills your hunger and saturation bars if you have Iron Rank+.
/essentials:etpacancel - Executes the same command as /tpacancel or /etpacancel.
/essentials:tpacancel - The same as /essentials:etpacancel.
/etpacancel - Executes the same as /tpacancel, which cancels any tp-requests you sent.
/feed - Same as /eat.
/firework - Will shoot a random firework above you.
/fix all;hand - Allows you to repair what you're holding/everything in your inventory if you have Diamond Rank+.
/fly - Gives you the ability to fly, you have to either buy fly, diamond rank or patreon rank to use it.
/fw - Executes the same command as /firework.
/getpos - The same as /coords.
/hat - Allows you to put whatever item you're holding on your head and wear it. Some items are restricted from being used as a /hat though.
/head - Does the same as /hat.
/heal - This command will put you to full health, remove all potion effects and saturate your hunger bar. Diamond+ ability, however, Buddy Rank+ can /heal other players.
/helpop - EMERGENCY COMMAND If there is a serious situation with no staff members online, you can use this command to notify an Admin. FOR EMERGENCIES ONLY.
/highlight - change the color of your name and a sound that plays when pinged in chat.
/home - Allows you to teleport to one of your sethomes.
/hug <player/:hug/console/bessie/autcraft> - Allows you to hug another player or any of the other subcommands listed.
/ignore <player> - Allows you to ignore other players by blocking their chat messages for you, you cannot ignore a Helper+
/jobs - Will display all subcommands for the jobs plugin.
/linesplit - The same as /splitchat, it allows you to seperate the chat messages using any character of your choice.
/list - Will show all players online apart from staff members in vanish.
/lock - Will display valid subcommands for the lockette plugin, using signs to lock chests, doors and anything a player can interact with.
/lockette - The same as /lock.
/m - Short for /msg, which is used to message people.
/ma - Displays a subcommand for the Mob Arena plugin.
/mail - Displays all subcommands and how to use the /mail command to send mail to users who are offline.
/mobarena - Same as /ma.
/modreq <message> - Allows you to request an administrator to do something, modreqs take up to 2 days to be completed. Generally used for claiming & bug reports that aren't done on the forums, but many other things too.
/msg <player> <message> - Allows you to message other players who are online.
/near - Shows all near players within 200 blocks.
/pb - Shows all subcommands for the paintball minigame plugin.
/perms - Shows what group of permissions you have in bungee.
/pp - Opens the particles menu
/ppo - Management for particles plugin, for admins only.
/pronouns - select pronouns to display in front of your user name in chat
/r - Allows you to reply to the last person who messaged you.
/removecurseditem - If you have put on a cursed item you cannot remove, this will delete the item.
/repair all;hand - Allows you to repair what you're holding/everything in your inventory if you have Diamond Rank+.
/reply - Same as /r.
/rules - Displays server rules.
/seen - Allows you to view how long a player has been online or offline. This command is only available to Helper+
/server <survival/creative> - Allows you to switch from creative to survival without using the world portals.
/spawn - Teleports you to spawn.
/split <character> Allows you to divide chat messages up by any character of your choice.
/splitchat - Same as /split.
/splitline - Same as /split.
/stables - Shows valid subcommands for the stables plugin, which allows players to store horses within the plugin, however, it is very glitchy and be weary when using it.
/status - Allows you to view previous modreqs and their status numbers.
/t - Same as /msg, allows you to message other players.
/teammsg - The command is disabled on the server, but was added in a 1.14 snapshot because players could be added to certain teams in vanilla and this was a way of communication between those teams.
/tpa <player> - Allows you to request to teleport to someone else.
/tpacancel - Cancels all pending requests you have sent.
/tpaccept - If someone sent you a tpa or tpahere request, you accept it using this.
/tpahere - Allows you to request that someone else teleports to you.
/tpdeny - Allows you to deny a tpa or tpahere request you were sent.
/tpno - Same as /tpdeny.
/tpyes - Same as /tpaccept.
/unignore - Allows you to unignore someone who is on your list of ignored players.
/w - Shortened version of /whisper, allows you to message other players.
/warp <warp name> - Allows you to warp to any warps or to check the list of warps.
/warps - Shows list of warps.
/wb - Shortened /workbench or /craft, it opens a crafting table menu if you have iron rank+
/whisper - Same as /w.
/who - Same as /list, shows all players online except for staff members in vanish.
/workbench - Same as /wb.
Description
Chat commands are tools players can use change which chat channel they are viewing. All /channel commands also work with /chan
Commands
/channel create <name> - create a new chat channel. Channel names must be one word with no spaces.
Example: /channel create private
/channel join <name> - join an existing chat channel
Example: /channel join spleef
/channel join - shows a menu listing all the available channels and the players that are in a channel
/channel who - see which players are currently in a channel
/channel close - close the channel so no one may join
/channel open - open the channel so players may join
/channel leave - leave the current channel and return to main chat
/chat <message> - send a message to main chat
Example: /chat Welcome to Autcraft, NewPlayerName!
Note: Admins and SrHelpers can monitor the chat channels to make sure the chat is appropriate.
Description
There are several ways in which players can communicate with each other both on and off the server.
Public Chat
To enter a message into public chat, press the T key on your keyboard to open the dialog prompt. A cursor will begin blinking within this prompt, indicating that it is ready to receive characters that you type into your keyboard.
Enter your message into this box and press the Return key on your keyboard to send that message. Everyone on the server (with the exception of those in Calming Rooms or Spam Rooms) will be able to see your message.
Private Messages
You also have the option to send a private message in which only one player will be able to receive it.
To send a private message, press the T key on your keyboard and begin your message with /msg. Press the spacebar next and then enter the name of the person to which you wish to send a message. Again, press the spacebar and then enter your message.
Example: /msg AutismFather Hi! How are you today?
To reply to a private message, you can follow the instructions above, placing their name in as the name of the person to which you wish to send a message.
Alternatively, you can shorten the command by using the /reply or /r command. In this case, you no longer need to include the player's name as it simply replies to the last person that sent you a private message. Be aware that if a player sends you a message while you are typing the reply, your message will reply to the most recently sent message.
Example: /r I'm doing great! Thanks. How are you?
Mail
The server also has an in game mail system so that you can send messages to players even when they are not online.
This command will display a player's in-game balance.
These commands show the same information:
Balance can be earned by completing actions that match a player's jobs, and by completing daily job quests. Quests can be seen with /jobs quests
In-game currency can be exchanged for emeralds at The Bank at /warp shops.
Description
Disguising became available on Autcraft in the RP World on March 18th, 2020.
The feature is provided by the plugin LibsDisguises.
Commands
This command will allow players to fly around most of the server. Having /fly enabled also prevents fall damage.
To enable, type /fly. Then press the space bar twice. Holding space will raise the player, and holding shift will lower the player.
Players who first join the server will not be able to fly. This command is available to earn in a variety of ways. It is available for purchase as a command in the permissions section of the store. Fly for Life is available for 15 store credits (or $15 USD). /fly is also included with Diamond, Netherite, and Patreon ranks.
All players can use /fly at spawn, regardless of rank or purchased permissions. In contrast, no one is able to fly in any minigames. Players also have access to /fly in the Creative Server, however please be aware that individual plots may be set to survival mode and the command will not work.
Description
The /helpop command is available to all players. It sends a highly visible message to all online admins from a player in the event of an emergency.
How to Use
Press T and type /helpop <your message here> then enter. For example:
/helpop A player is threatening me now by writing bad things on a sign!
When to Use
When an emergency is happening. Some example of emergencies are when you are being harassed (spammed teleport requests by one person, someone is at your unprotected home at that moment griefing it, a player won't leave your home after being asked, you are 'stuck' in one spot, or you are being threatened or made to feel uncomfortable in any way), or there is a threat to the server's stability.
When Not to Use
If you only want to talk or ask an Admin a question that isn't an emergency, or need anything usually done by submitting a modreq. This should not be used to chat with a vanished admin outside of an emergency.
The /highlight command allows players to choose options for when their name is mentioned in chat.
Description
In order to keep your valuables safe, you have the option to lock your doors, chests, furnaces or any other containers using a Lockette sign.
How to use
To use, place a sign without crouching (do not shift) on the door, chest or other container to be locked. The sign will automatically lock to the user who placed it. Another option is to place a signpost on the floor directly besides, or on, a chest or other container to be locked. Enter [Private] as the first line. The player's own name will automatically be entered on line 2 as the chest owner. Players can also type in the full names of two other users allowed to access the chest's inventory on lines 3 and 4.
Sometimes, a player might want to allow more users access than can fit on one sign. The owner of a container can add more users by placing additional signs beside the container with the heading [More Users] where lines 2-4 specify the names of the additional users. You can edit the users on previously placed signs by right clicking the sign and using the command /lockette <line number> <text> to change it.
Example: /lockette 3 username1
If you would like to allow everyone to access a container, you can add a line with [Everyone] to the sign. Keep in mind though, this means anyone can access the container!
Note: that this means that nobody can break the sign, even the person who placed the sign.
Doors
To protect a door, you can use the same method as protecting a container, the sign will attach to the door automatically. In addition, you can attach a [Private] wall sign to any side of the blocks just above or just below a door. For double doors only one side needs a sign.
Once a door is protected it will only open for someone listed as a user and will not respond to redstone power or switches unless [Everyone] is listed as a user. Iron doors which usually won't open from clicking will work just as wooden doors. In addition, double doors will open together automatically!
You can also use [More Users] signs as with containers, with the caveat that the sign cannot be placed on the block above the door if the [Private] sign is not above the door as well! (This is done to prevent a security uncertainty issue.)
Protected doors will be closed automatically if a timer is set. A timer can be set globally with a configuration option, or individually for each door by using the tag [Timer: #] on line 3 or 4 of the [Private] sign, where # is the number of seconds that the door should remain open. If the timer is set to 0, this means the door will never automatically close.
Description
Sometimes the admins are busy or there isn't an admin on when you need them. To take care of this, we've implemented a "support ticket" system called '''Modreq'''. “Modreq” is an abbreviation for moderator (admin) request (objective your require help with).
At any time, whether admins are online or not, you can create a ''modreq'' indicating to admins that you need them for something.
Create a Modreq
Command: /modreq <your message here>
Example: /modreq please protect my home
It's important to remember that you must make your ''modreq'' in the place that you need the request done. For example, if you need a house protected, make the request in that house. Admins teleport directly to the location in which the ''modreq'' was created so it needs to be created where the work needs to be done.
View your Modreqs
Command: /status
This command will give you a list of all ''modreqs'' that you have created by their ID numbers.
View a Modreq
Command: /status <#>
By entering a specific ID number after the status command, you can view the details of that ''modreq'' including admin's actions and comments.
Note: You can only view the status of a ''modreq'' you submitted.
Comment on a Modreq
Command: /comment <#> <message>
Example: /comment 1234 write the comment here
In some cases, you may want to add more information to your modreq, or perhaps there wasn't enough room on the command line to include all of the information you wanted.
By entering the comment command followed by the ID number of the ''modreq'', you can then place an additional comment after, providing the admins with all of the information they need.
Note: You can only comment on a ''modreq'' you submitted.
Close a Modreq
Command: /done <#> <message>
Example: /done 1234 the problem has been fixed
Sometimes you might want to close a Modreq, such as if you created one by mistake or you no longer need help.
By using the done command followed by the ID number of the Modreq, you can close the Modreq immediately, even if Admin haven't replied yet.
Note: A Closed Modreq can't usually be re-opened later. If you need to re-open a Modreq, it may be easier to create a new one.
How Long Until a Modreq Is Completed
Admins do modreqs in the order they receive them and can take up to 1-2 days to complete. We thank you in advance for your patience.
Have a Question About Your Modreq?
Please check the status of your modreq before asking an admin.
The /pronouns command allows player to have their personal pronoun displayed alongside their user name in chat.
Pronoun display can be turned off with /pronouns Off
A pronoun is a word used instead of a noun. Well then, what is a noun?
A noun is a person, place, thing, or idea.
A pronoun is used in place of a noun.
What about pronouns on Autcraft?
(Autcrafter)<He/Him> Steve: Hello, Friends!
Steve wants to be called “he” or “him” when we talk about him.
(Autcrafter)<She/Her> Alex: Hi Steve!
Alex wants to be called “she” or “her” when we talked about her.
(Autcrafter)<They/Them> Wandering Trader: Hello! Would you like to buy this cactus?
Wandering Trader does not want to be called “he” or “she.” They would like to be called “They” or “Them.” You may also call them by their full name: Wandering Trader.
Wandering Trader will be sad if you call them something they are not. Friends don’t make friends feel sad. Please call Wandering Trader by their name, or using the pronouns They/Them.
What should I do if I don’t understand how to use my friend’s pronoun?
Just call them by their name.
(Autcrafter)<He/Him> Steve: Hey Alex! Did you see what Wandering Trader was selling? You should check out Wandering Trader’s items!
What about pronouns I have never seen before?
This is my friend Creeper Xe likes to sneak up on people. I like to watch xem blow up dirt. Xir explosions are loud!
Description
Helpers, SrHelpers, and Admins in-game can use the /seen command to view how long a player has been online or offline.
Note: The command is not caps sensitive, so writing the name of the person in lowercase letters will still work with the command.
Note: This command is only available to Helpers, SrHelpers, and Admins.
Command
/seen PlayerExample1234
Description
The spawn command is a command that is used to teleport back to spawn.
Command
When a player wants to return to spawn they type /spawn. If a player has used the /tpa, /home, or /warp commands in the past two minutes and attempts to use the /spawn command, it will not work unless they have a rank that bypasses teleport timer.
Description
Players can teleport around the server in various ways. You can teleport to someone, have someone teleport to you and you can teleport to locations using commands or warp buttons.
Teleport requests
Requesting to teleport to others and vise versa can be done with commands that start with ''/tpa''.
TPA
Command: /tpa <player>
Example: /tpa username1
You can send a teleport request to another player using the ''/tpa'' command. This will prompt that other player to either accept, deny or ignore your request.
TPAHere
Command: /tpahere <player>
Example: /tpahere username1
If you wish to have a player come to you instead of going to them, you can use the ''/tpahere'' command. This will prompt that other player to either accept, deny or ignore your request.
TPAccept / TPYes
Command: /tpaccept or /tpyes
When you receive a request from another player to either allow them to teleport to you or to have you teleport to them, you can accept their request using the /tpaccept or the /tpyes command. This command accepts the last request made to you. So if one player sends you a request and another player sends you a request as well before you can accept, you will be accepting the second player's request, not the first.
TPDeny / TPNo
Command: /tpdeny or /tpno
When you receive a request from a player to either allow them to teleport to you or to have you teleport to them, you can deny their request using the /tpdeny or the /tpno command.
TPCancel
Command: /tpcancel
If you accidentally send a teleport request to the wrong person, you can cancel it by typing in ''/tpcancel''.
TPToggle
Command: /tptoggle
If you do not want people to teleport to you, you can use ''/tptoggle'' to make it so that when someone sends you a teleport request, it is automatically denied. This command is only available to people with Patreon rank.
Spawn
Command: /spawn
You can teleport to Spawn by entering the ''/spawn'' command from anywhere on the server.
Timer
Shortly after Autcraft began, a teleport timer was added to discourage players from teleporting all around the server all of the time without actually exploring or traveling by any other means.
The constant use of teleportation proved to be very taxing on the server and generated a lot of lag.
Initially, the TP Timer was set at 5 minutes. This was removed completely for January 2014 as the initial world was closed and new worlds were created as a means to give players greater ease with which to move their belongings. When the timer was reinstated in February 2014, it was reduced in duration to 2 minutes where it remained until March 18th, 2020, when it was reduced to 30 seconds, where it stays today.
Description
Vanish is a command available to Admins, which allows them to be invisible on the server and not appear on the online player list.
Conditions
Used when an admin needs to focus on work either on and/or off the server and is not available for chatting. The /vanish command is only accessible to the players with the rank of admin. No other ranks have access.
Chatting to a Vanished Admin
Use /r <message> to reply to a vanished admin, if they private message you.
What a Player Should Know and Do
We are not ignoring you. We may not be at our keyboard, we may be back and forth between the server and various other places on the internet, or talking to another player privately. Please do not ask us to private message you in public chat, if you know we are online. If you have an emergency, please use the /helpop command. If it is not an emergency, please modreq what you need.
Description
A Protection is an area around your land that essentially locks the permissions to only you and other players of your choosing. Once protected, no other players will be able to place or break blocks within your protection.
Your protection will also include a custom greeting that appears in chat for any player that enters as well as a farewell message that appears in chat for any player leaving your area.
Requirements
Your build must be 30 blocks or more away from every other build around it. If there is something created by another player already existing within a 30 block distance to your requested build, then it can not be protected.
In order to have your area protected, you must have something build that is clearly visible to the admins. If your base is under ground, then you must mark out its furthest edges above ground.
If you need it protected before you have time to begin building, you must, at the very least, mark out the area using clearly visible materials, such as wool or coloured glass. If the admins can't find it, it won't be done.
Requesting Protection
To request that your build be protected, you must stand within the area to be protected and issue a modreq
30 Block Rule
As stated, you must be at least 30 blocks away from all other player's builds in order to be approved for protection.
However, players must realize that builds are protected with a 10 block buffer. This means that your base will be protected as well as 10 blocks out from your base in each direction. This means that if another player builds 30 blocks away and their base is also protected with a 10 block buffer and both players expand up to the edge of their protection, it could look like both bases are actually only 10 blocks apart, not 30.
Adding Members
You can add other players, called region members, to your protection, enabling them access to build with you.
To list members of your region, type /rg info in the chat.
Additional Options
You may request, in your modreq to have your area protected, to include these additional options as features of your protection:
Description
Region members are players you allow to build/place/break or otherwise move blocks and items in your protected region.
Choosing Members
Members should be players you like, know well and trust.
Member Limit
Each region may have one owner and up to 6 members.
Add A Member
Stand in the region you own and want them to be a member of, then modreq for an admin to add the player to your region. You must provide the full and correct username of the player, at that time.
Remove A Member
Stand in the region you own where they are member and modreq for an admin to remove them from your region's member list.
Note: You must allow the member to remove their items first, before removing their membership. If this is proving difficult, please alert an admin and we will assist you.
Listing Members
To list members in your protection, type /rg info while in the protection
Description
Most players build and set homes for themselves somewhere on the server. Some players have multiple homes. There is a system which allows you to keep track of these and even get around from home to home easily.
Home
Command: /home <name>
Using the home command, you can instantly teleport to your home from any location on the server. Remember to give your homes a name though so that you can go from home to home if need be. Also, use descriptive names that are easy to spell so that you never forget which home is which.
Example: /home cave
SetHome
Command: /sethome <name>
Stand in the location that you want to return to each time, generally in the middle of your base or at your storage area or somewhere that you know you'll want to be each time, and enter the ''/sethome'' command to set the desired location of your home teleport.
Remember to give it a descriptive name that is easy to spell.
NOTE: Home names can not have spaces in them because it will only put the first word in.
Example: /sethome cave
DelHome
Command: /delhome <name>
Sometimes you may wish to abandon a home, if you are moving or if you run out of available homes that you can set. In this case, you can "unset" a home by entering the ''/delhome'' command.
Example: /delhome cave
Limit
When you join Autcraft, you are given a limit of 5 homes. That means that you can do the ''/sethome'' command, assigning 5 separate homes that you can teleport to at any time with the ''/home'' command.
Description
Griefing is the breaking and/or taking of any item or block placed by another player without the owner's permission; or the placing of items/blocks inside or on the builds of others without their permission.
Examples include but are not limited to:
If This Happens to You
Take a deep breath, then modreq where it happened, telling an admin what you believe is missing or damaged. We will check the history of the area and replace/repair what is needed.
What To Do If You Grief Accidentally
Modreq, standing where it happened, if you cannot repair the damage yourself.
Consequences of Griefing
If there was no modreq to repair an accidental griefing by you, items taken will be removed from your inventory and you will be mailed with a warning on the first griefing; jailed for 24 hours on the second. If griefing continues, admins will assess your history and discuss a longer jail time, possible temporary ban, or removal from the whitelist until your parents are contacted and respond. If you are an adult, you risk a longer jail time or removal from the whitelist, until we feel you understand the rules and will no longer grief.
Exceptions
Region Members of your region cannot technically grief it. They are people you have asked to live with you, because you trust them. It is up to you to choose your members wisely, make sure they understand what you will and won't allow to be done in your region, and to modreq for their removal as a member from your region, if they do not respect your wishes. If items are missing or placed in your protected region, this normally means a member of your region has removed or placed an item. Please ask for the items to be returned or removed by your members before alerting an admin, in this situation.
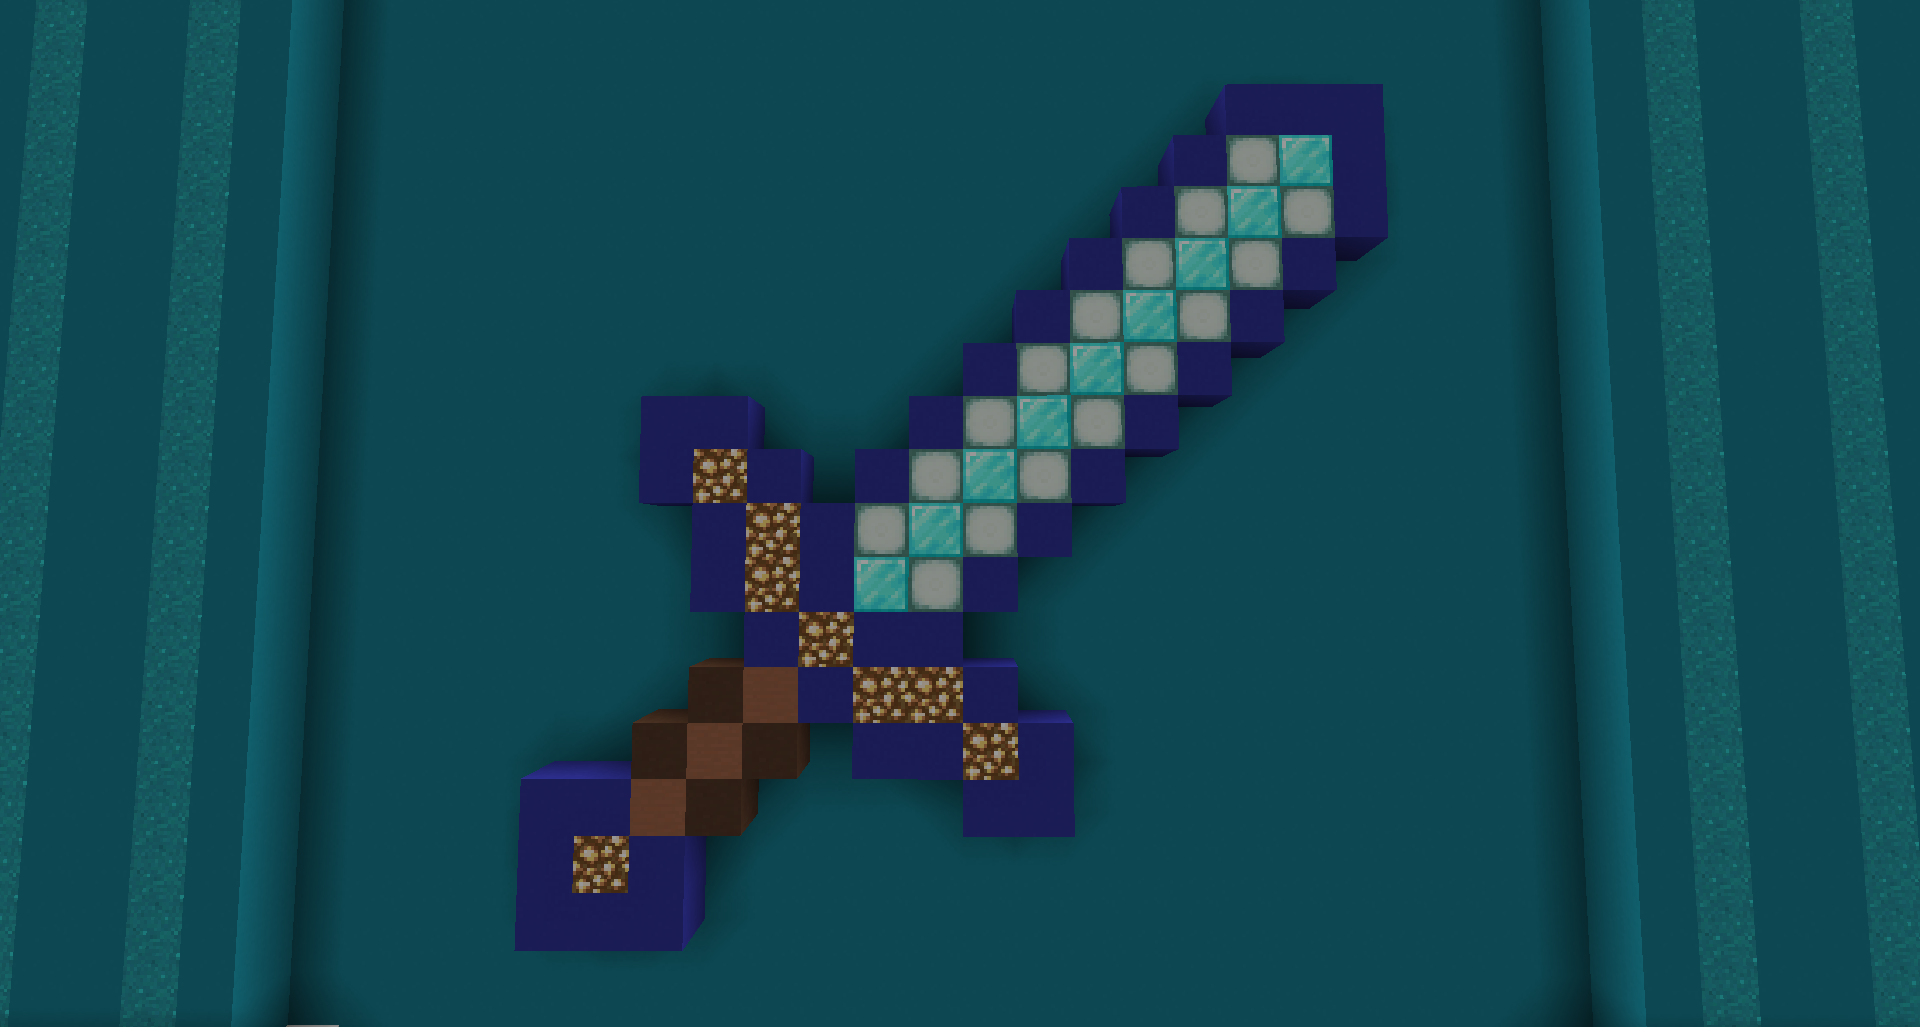
Description
The AutismFather Sword is designed to be the ultimate reward on the Autcraft Server for players who not only go above and beyond in being helpful and kind but go to extraordinary measures for the benefit of the entire community.
The AutismFather Sword was added to Autcraft on August 26, 2013.
The AutismFather Sword, as displayed in the TARDIS
View
AutismFather created this video on August 26, 2013, explaining the sword.
The Sword
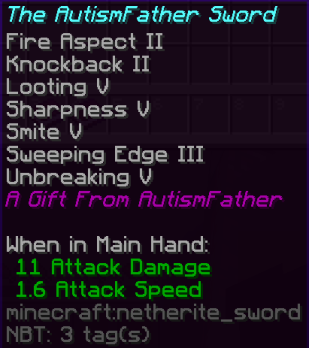
The AutismFather Sword is a Netherite Sword with a special name, lore, and a special combination of enchantments that you can not get in the game normally.
Enchants
Lore
Lore is the purple text below an item's enchantment list. The AutismFather Sword's Lore is ''A Gift From AutismFather''
How to Get It
You earn this sword by not only having these qualities but by demonstrating these traits often:
If you put your community first, ahead of yourself, and are always thinking of others, you will earn yourself the best sword on the server.
Sword Holders
Description
Caught Being Awesome, known as CBA, is the term used to describe the act of catching players during random acts of kindness or friendship or sharing or any other positive way that makes a positive impact on others.
How to get a CBA
Players are generally just discovered by the watchful eye of those with the Admin, SrHelper, and Helper ranks.
Screenshots or logs are captured of the moment and recorded into a hidden forum where they can be reviewed and stored.
Players who are Caught Being Awesome are awarded with .5 credits on the Autcraft store.
Players are encouraged to tell staff when they see someone being extra kind or helpful in game.
If a player sees someone going the extra mile to be kind and helpful to others, they can let staff know by submitting a book at TAO. Located north of the world portals room, this area can also be reached with the command /warp tao
Grab a free book from the dispenser. Write the message and sign the book with your player name. Drop it in the hopper. It's that easy!
- Understanding, Kind, Friendly -
The Player of the Week, or POTW, is the player that stands out the most during the week from Saturday to following Saturday. It used to be Monday to Monday before the day was changed in January 2018.
Earning Player of the Week is actually tougher to do than earning a CBA due to its competitive nature. Often, many players stand out through the week but only one player can be chosen.
To be that one special player selected to be POTW, you must exhibit one or several of the following:
The Admins and SrHelpers nominate players each Saturday that they feel are good candidates for POTW. Admins discuss all of the nominations, exchange notes in case anyone missed anything and then the Player of the Week is selected. Generally the POTW is announced on the server each Saturday at 4:00 PM Server time (16:00 displayed on the Tab menu, 4:00 PM Eastern Time)
From the first POTW until December 2017, POTW was always announced on a Monday, but in January 2018 announcements happened on Sundays to make it easier for Players to join the event. Starting on 2nd May 2020, the POTW announcement was moved to Saturdays.
The POTW will have with their player head and signs announcing their position inside the TARDIS. Players are also awarded 4 credits on the Autcraft Store.
The Learn About section of our wiki contains information on many frequently asked about topics on Autcraft. This section is regularly updated as new features are added to the game. To see each article, select "Learn About" from the wiki navigation menu, then choose a topic. You can learn about features such as:
If you would like to see a topic added to this area of the wiki, please make a post in the suggestions section of the forum.
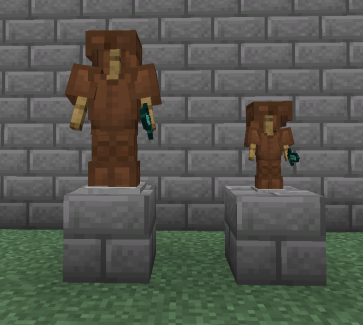
Description
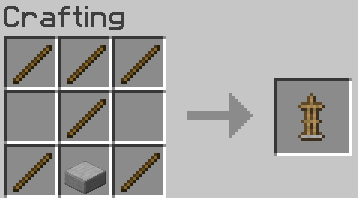
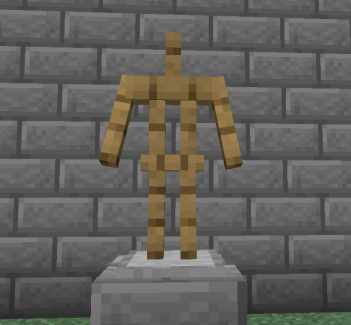
Have you always wanted to know how to pose your armor stands in different ways to add some fun to your builds? Read on to learn all about the armor stand editor!
How to Use
First, you must craft an armor stand. The recipe calls for 6 sticks and 1 smooth stone slab. You can make smooth stone by smelting a piece of regular stone block.
After placing your armor stand, shift and right click or type /armorstand near to bring up the editor GUI. If you are positioning more than one armor stand, you can use /armorstand last to bring up your most recent one.

Each wool block controls a specific setting, as seen when hovering over the blocks.
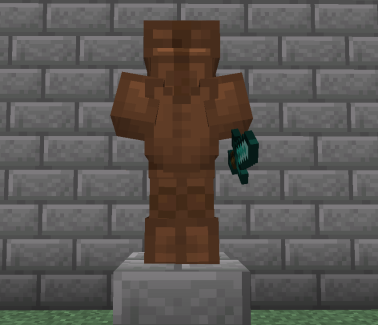
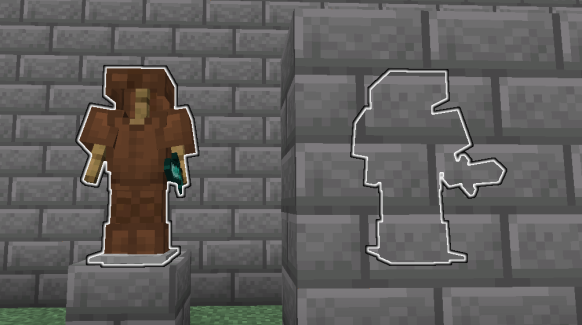
Compass
Open Position Options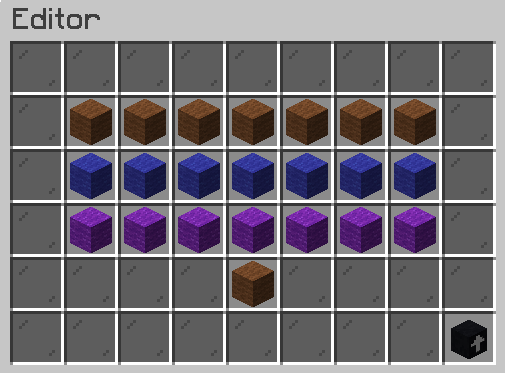
From left to right, each row controls the head, torso, left arm, right arm, left leg, right leg, and position. Position refers to the full armor stand, while the other options control individual parts.
The brown wool blocks control the X axis. Blue controls the Y axis, and purple controls Z. While Y is always up and down, the X and Z are relative to your coordinates. This means one direction will not always be to the "left." You will need to experiment to see which direction to move your armorstand.
Left clicking increases the value, while right clicking decreases. Holding shift while clicking will move increase/decrease at a quicker rate.
Using these various options will allow you to pose your armor stand any way you wish.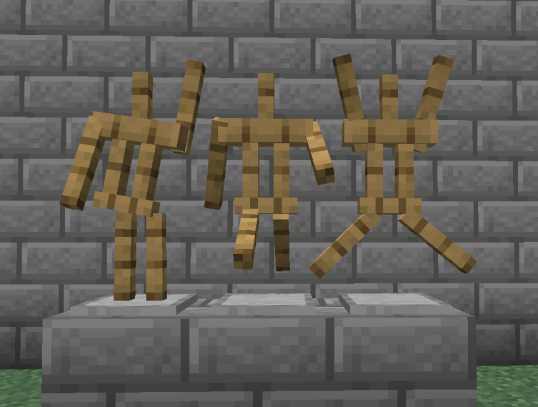
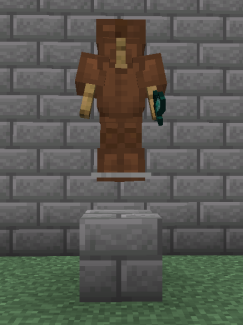
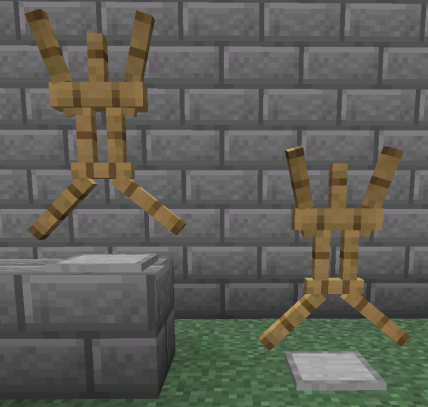
Paper
Open Clone Picker

Each wool block corresponds to a setting you chose while editing your armor stand. On this screen, you can choose which things you want to copy to a new armor stand. After choosing which options to keep, you will be instructed to right click a new armor stand, or to punch a block (left click) to cancel.
![]()
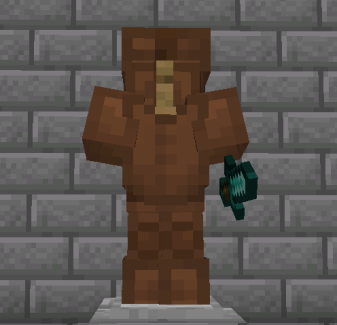
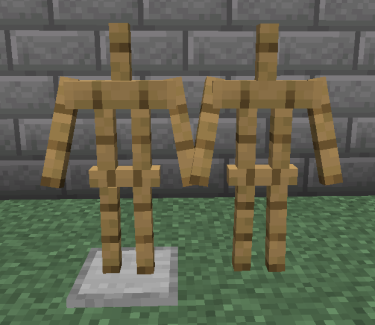
When your armor stand has been successfully copied, you will receive this message in the chat:
![]()
Now you have made an identical copy of your display
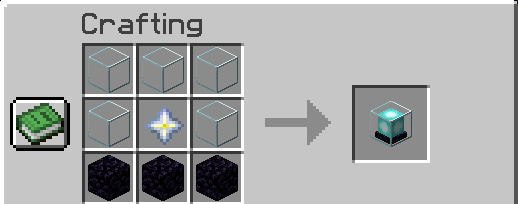
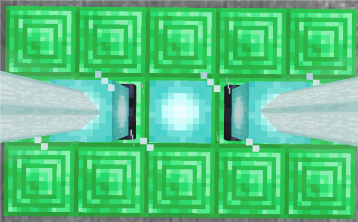
Beacons are used to apply a variety of effects to an area, which is determined by the size of the beacon pyramid.
Beacons are crafted with 5 clear glass, 3 blocks of obsidian, and one nether star.
The size of the pyramid will determine which effects you are able to choose, as well as the the range of the effects (how many blocks away from the beacon they will work). The level of a beacon refers to how many layers. How to construct each level will be shown after this section. Pyramid levels 1-3 can choose one effect. Level 5 can choose a secondary effect.
A fully maxed beacon pyramid with all effects will require 6 beacons, 5 at level II effects, with the 6th set to Regeneration.
Pyramids can be built from any combination of iron, gold, emerald, diamond, or netherite blocks. They must be completely solid. The beacon is placed at the top of the pyramid on the center block.
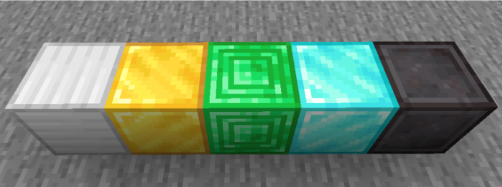
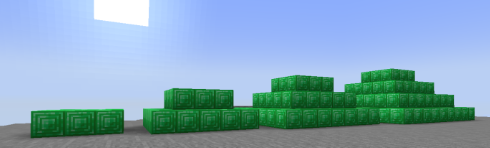
Right click the beacon to bring up the menu. The beacon must be "fed" a netherite ingot, emerald, diamond, gold ingot, or iron ingot in order to apply the effect. Level 4 beacons will require a second "feed" to apply the secondary effect.
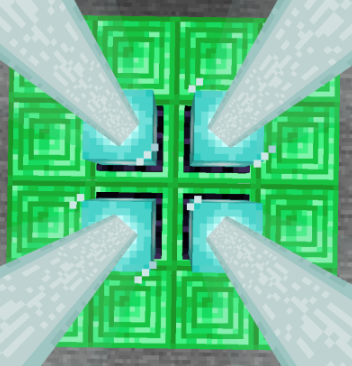
Beacons must be surrounding by blocks on all sides on the top layer. This is best seen with a level 1 beacon

When adding a second beacon, more blocks must be added to maintain this requirement.
A third beacon can be added the same way.
When adding 4 or more beacons, they can either continue in a line, or can make squares and rectangles.
The rest of the pyramid will need to be adjusted to continue the solid structure. Here is a level 4 pyramid with 2 beacons.
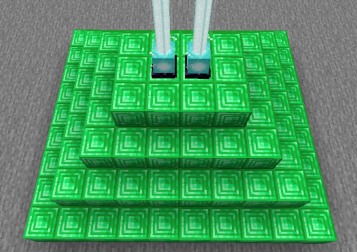
There is no fancy math involved in doing this. Simply decide how many beacons you need to use. Place them on top of a 4 block tower. Build out and fill in the beacon making sure each later expands by one block, from top to bottom.
A fully maxed out level 4 beacon with all 6 buffs will require 244 mineral blocks.
Players can have a variety of skins in the game. This page will explain where to find them, how to make the change, and review what is an is not appropriate for Autcraft.
There are a variety of websites that can be used to find the perfect skin. For these directions, we will look at The Skindex. Use the search bar to look for something specific, or browse the various options. Let's use this cute fox skin as our example:

We have decided to change to this skin. The first step is to download the image using the Download button on the right side of the page. Please remember where you save the file to so you are able to find it again. Creating a folder for minecraft skins on your desktop is an easy way to do this.
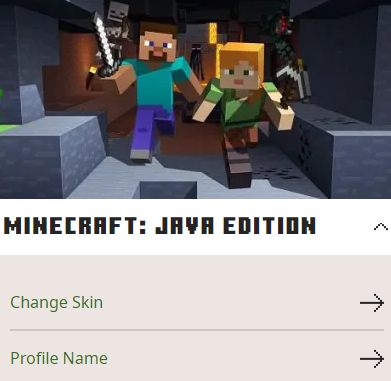
For this next step, there are two options. For the first, we need to visit the Minecraft website. Log in with the link in the upper right corner of the page. The next page will show your Minecraft games. Make sure to do this in the Java Edition section.
Select "Change Skin."
The model you choose will determine the size of the skin. When in doubt, choose Classic. If you discover black lines on the back of your skin that shouldn't be there, you may need to upload your skin again and use the Slim model.
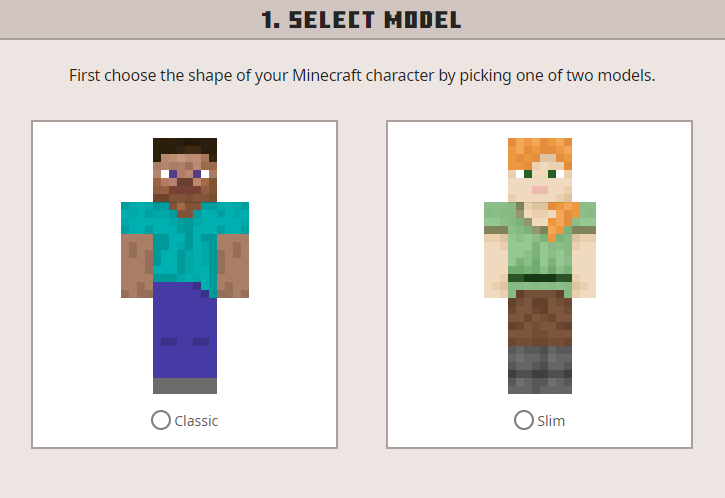
Now it's time to upload the image file you downloaded. Click the button that says "Select File" and then search your computer for the location you saved the file to. After it has been selected, click Open. The skin will appear on the screen when finished. At this point you can leave the Minecraft website.
Open the Minecraft launcher. At the top of the window will be a few tabs. Select "Skin."

This page will display all skins you have used. Your new skin will appear on the page. Hover over the thumbnail for options, which will allow you to use the skin of your choice, or apply a special name to the skin.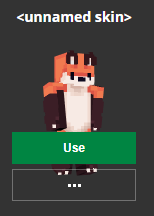
A second option is to add a new skin directly through the launcher Visit the Skins tab, then choose either the wide (classic) or slim model and click the browse button. At this point you will need to navigate to the location where the skin image file was saved. Select the file to upload it.
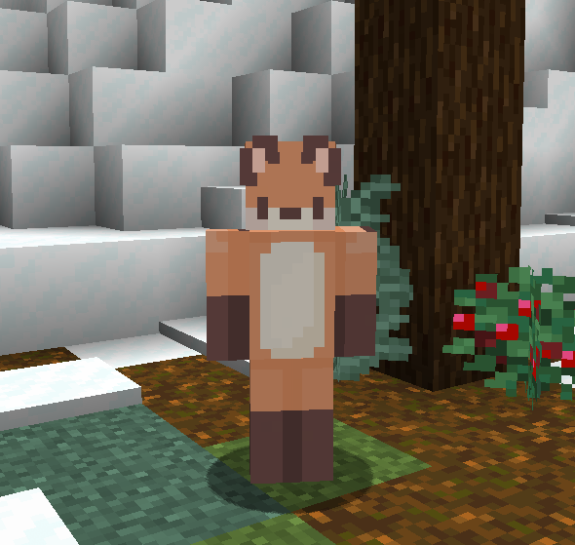
Enjoy your new skin!
A "drop key" is the key on your keyboard when tells the game to drop the item you are holding. Whatever items you are currently holding when the key is pressed, will be tossed to the ground. Accidentally hitting this key while playing is the most common cause of lost items.
Key Bindings
Key bindings are a setting in computer programs that cause a specific action to happen when pressed. A great example of this is in word processing programs. Copy and page can be quickly done with CTRL + C and CTRL + V (⌘ +V/C or CMD + V/C on a Mac. Keyboard shortcuts are a type of key binding.
When to Change
In general, it is good to stick with the default key bindings. It makes it much easier to get help when wanting to know how to do a specific action, or answering other people's questions. Another consideration is that most key binds are standard for gaming. Small differences do exist, such as a sprint key, or opening inventory. It may make sense to change your bindings to be consistent between the games you play.
It is also worth changing your key bind if you repeatedly hit the key on accident, negatively affecting your game play. The default drop key (Q) is a great example of this. The most common cause of lost items on Autcraft is from players accidentally bumping Q while using the movements keys (WASD). The best way to avoid this happening, is to change the drop key.
Deciding on a New Key
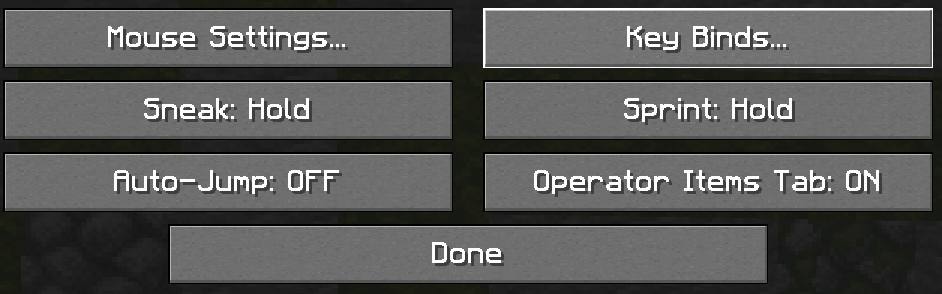
The first step is to go to the key bindings page in your game settings. You can get there with Escape > Options > Controls > Key Binds...
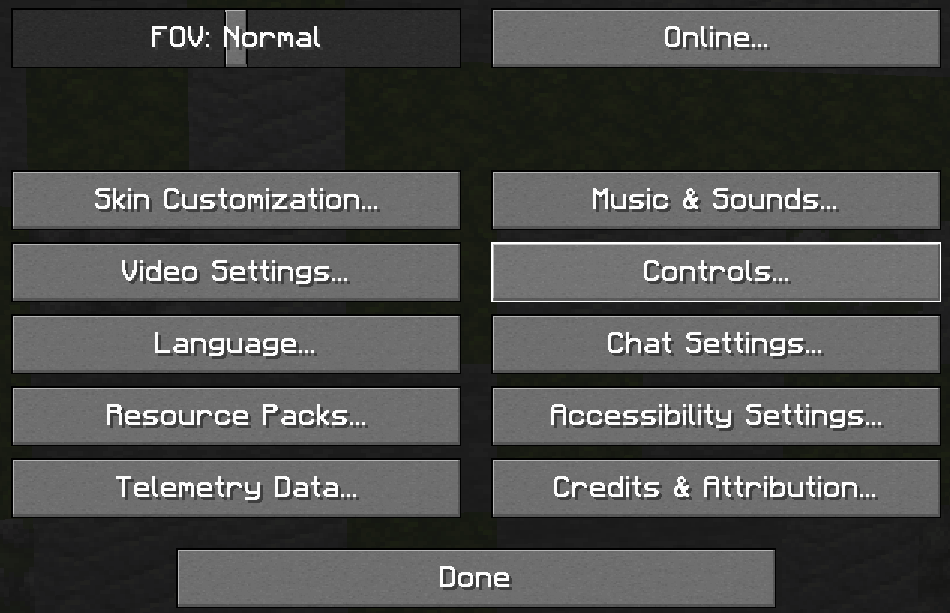
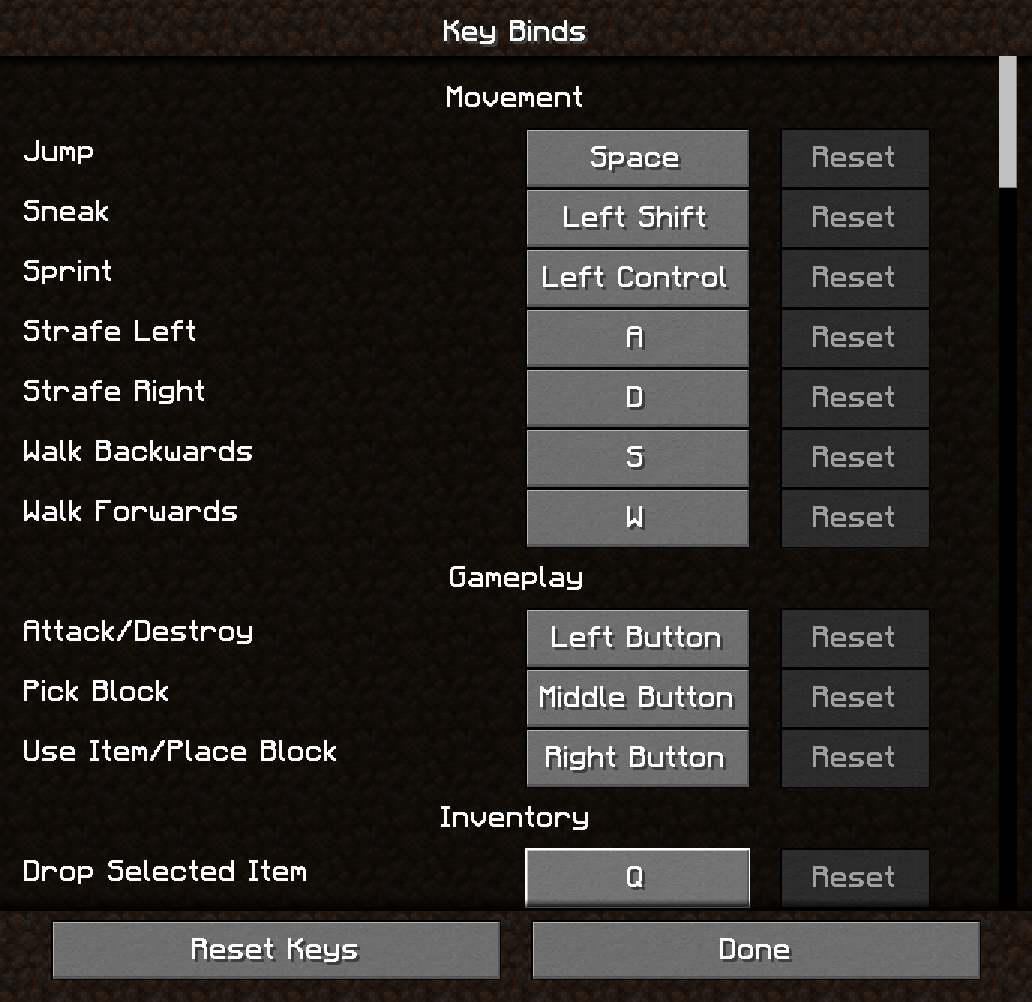
This page is where you can change any of your bindings, or completely remove them. At the bottom of the above image, you will notice that Q is set for "Drop Selected Item." This is the key we are changing.
Clicking on the button that says Q will change it to say > Q <. At this time, you can select another key. Any key on your keyboard can be bound to an action.
Let's start by changing our drop key to the space bar:
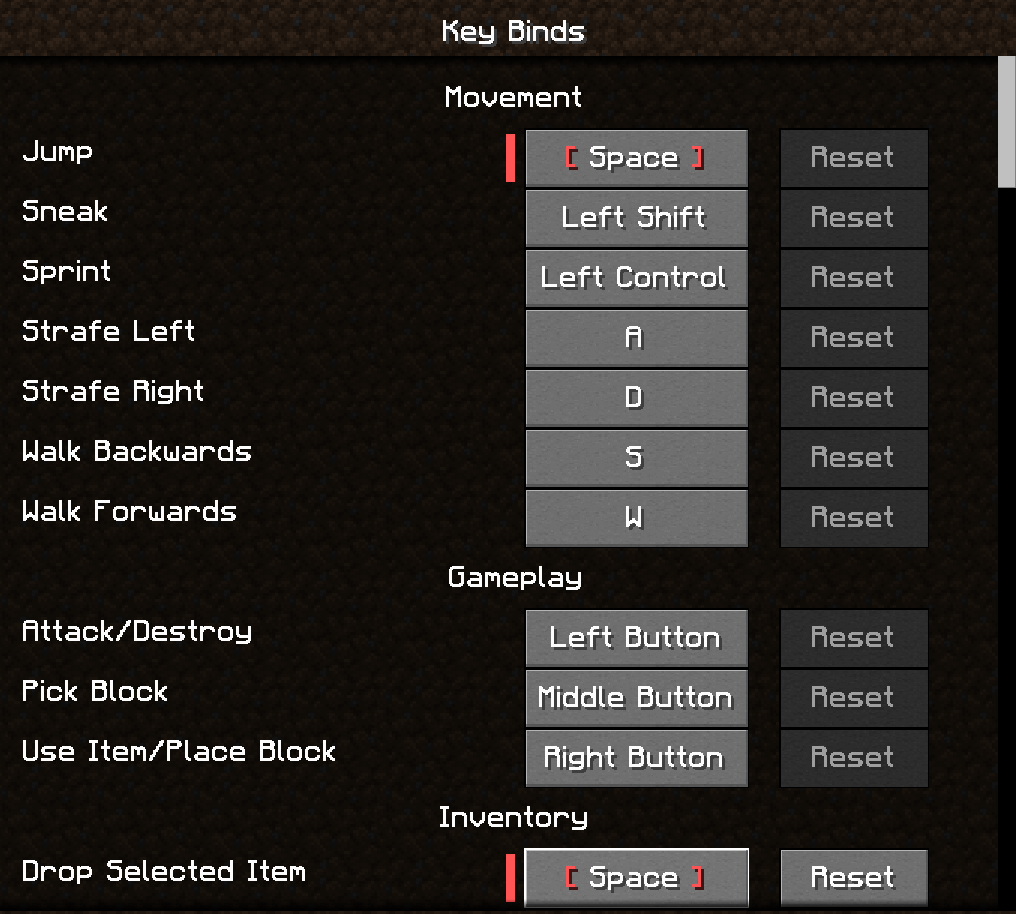
The red marks that have appeared let us know that there is a conflict with this selection. One key is assigned to two actions. In this example, space bar is assigned to "Jump" and "Drop Selected Item." This means any time you press the space bar, both of those things will happen. It is important to choose a key that is not already assigned to something. The keys that are available will depend on what other mods you may have installed.
To prevent accidentally hitting the drop key, consider choosing a key that is not next to your directional keys, or other keys you frequently use during the game. In this example we are using Backspace/Delete.
![]()
To leave this screen, either press "Done" or hit escape to return to your game.
![]()
I Messed Up! How Do I Fix It?
The easiest fix it to select the "Reset Keys" button at the bottom of the Key Binds page. This will return all bindings to the default setting.
All My Keys Are Assigned! How Do I Find One!
Find a key bind that you aren't using. Perhaps one assigned to a mod or a feature that you don't use. Click the button with the current binding and then click escape/esc. This will unbind the key.
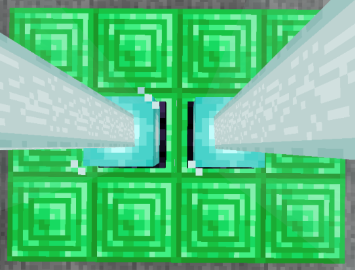
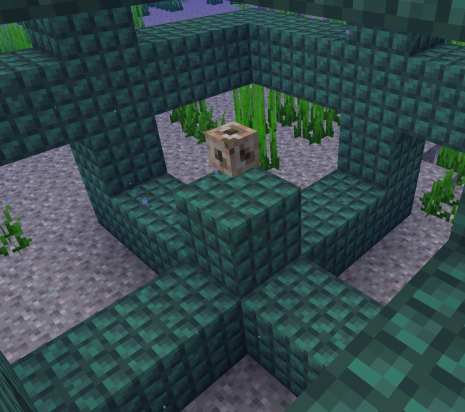
Conduits allow players to stay under water indefinitely without the use of potions or an Ocean Prince boss head.
From the Minecraft Fandom Wiki page:
"This effect restores oxygen, gives underwater night vision, and increases mining speed by 16/7%. Conduits also damage any hostile mobs, like drowned, guardians, and elder guardians, within a range of 8 blocks of the conduit. Conduits can be activated in any biome and at any height or depth."
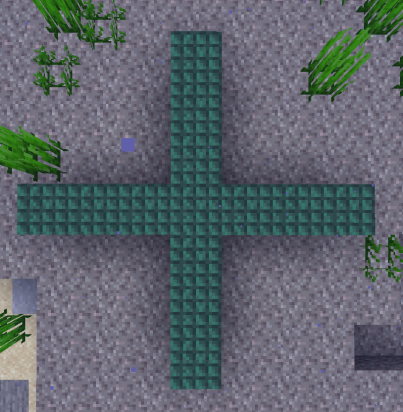
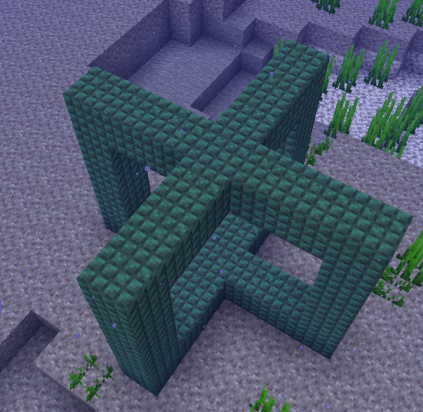
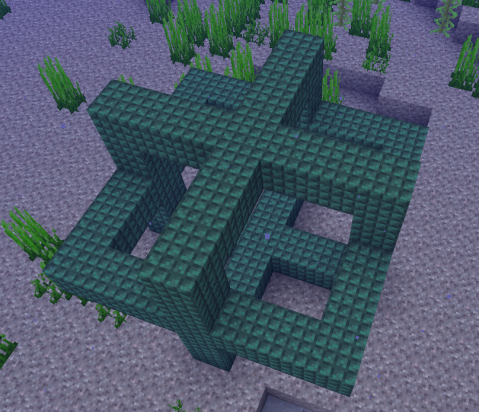
The activation frame of the conduit must be built out of prismarine block, prismarine bricks, or dark prismarine block.
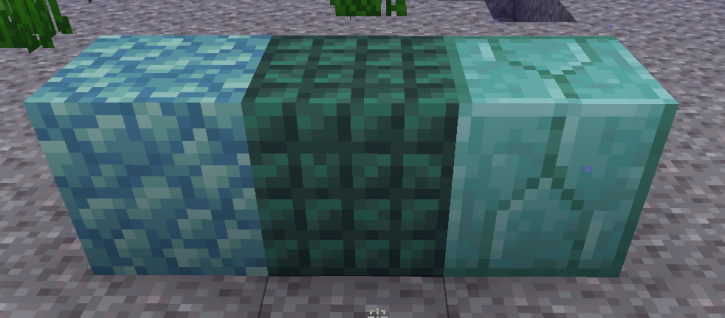
The frame is built as follows:
Begin with a cross shape, 5 blocks by 5 blocks. This image is looking straight down from above.
Next, stack four blocks on each end, for a total height of 5 blocks. Repeat the same cross pattern on top.
Add a square going around the center of the frame.
In the bottom center of the frame, place another block, with the conduit block on top. (See below how to craft the actual conduit block)
Remove the block that was just placed so the conduit is "floating" in the center of the frame. This will activate the conduit.
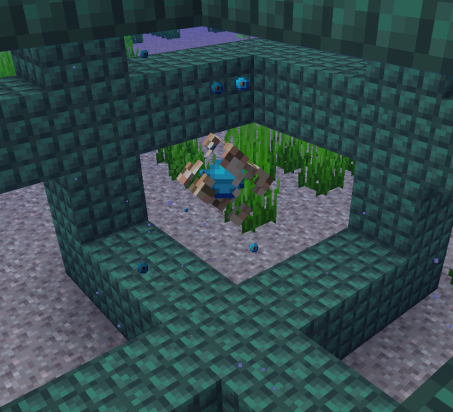
If the activation was successful, there will be an effect icon on your screen.

A conduit is made by placing 8 nautilus shells around a heart of the sea.

Autcraft features many unique items, including some that you can craft yourself! Read on to learn how to make some special recipes.
Leap Frog's Head
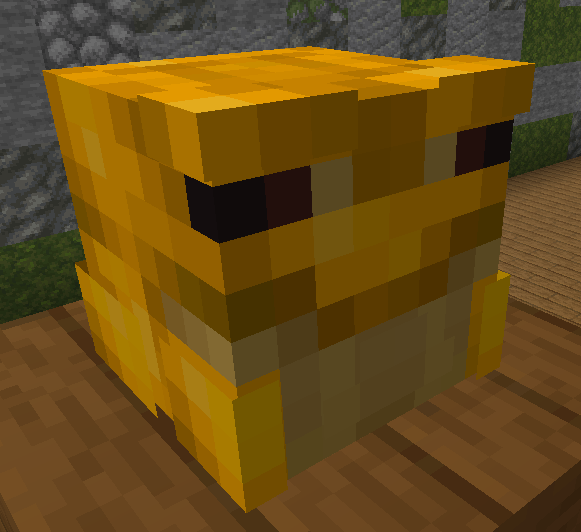
Combining one of each Shiny Frog (temperate, verdant, and pearlescent) on the crafting table will result in a Leap Frog's Head. Wearing this head will give you Jump Boost VI.

Wither Miner
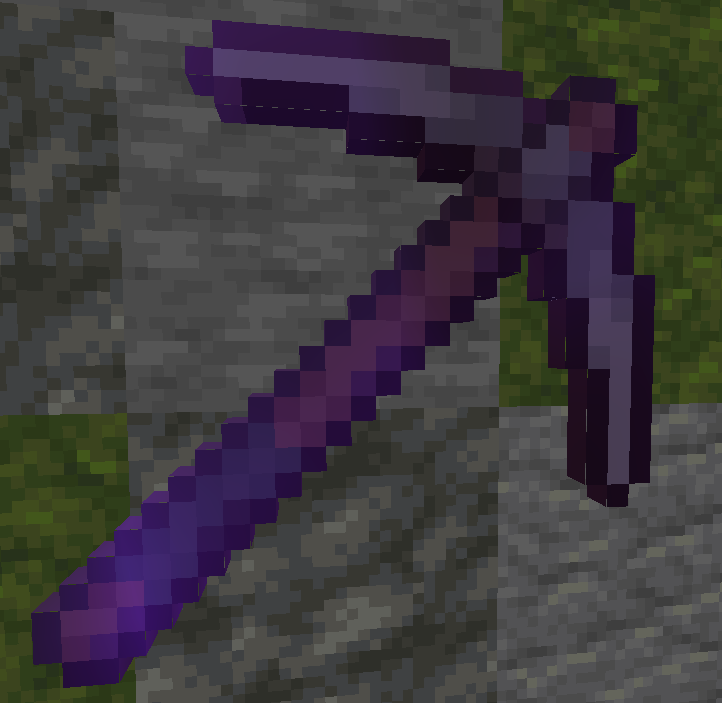
Crafting together one of each Shiny Wither variant will create a Wither Miner pickaxe. This amazing tool features Efficiency VIII, in addition to Mending, and Unbreaking III. The attached lore states "Powered By The Souls of the Forgotten." When combined with a haste II beacon, this pickaxe can insta-mine deepslate!

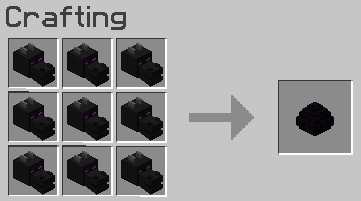
Dragon Egg
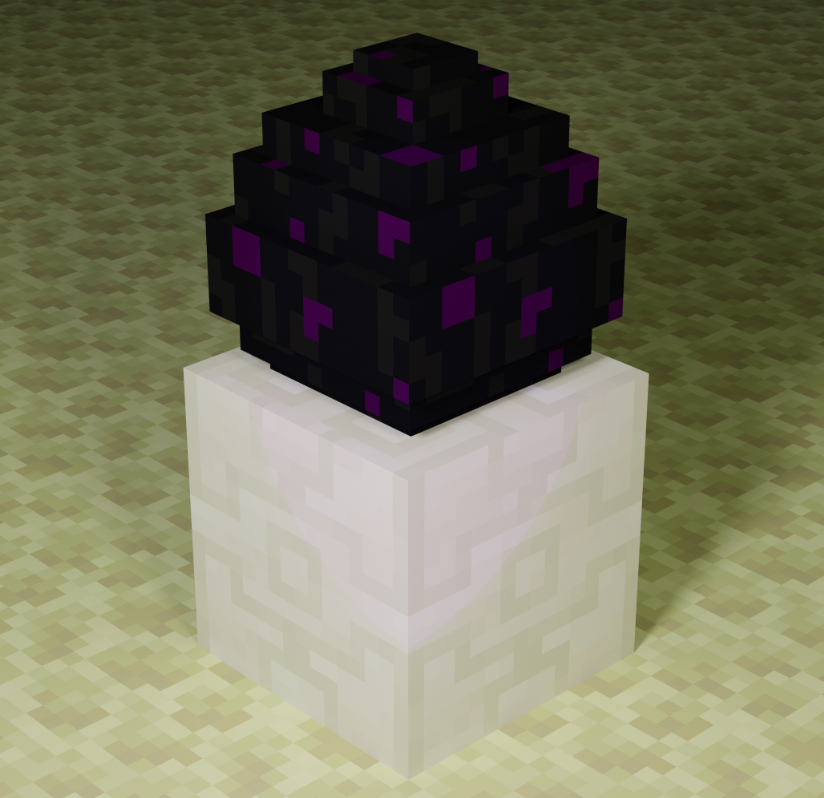
Dragon Eggs are a much sought after item on Autcraft, considering there is only one available each month. Normally, an egg only goes to the first player to kill the Ender Dragon after the resource worlds reset. Now, anyone can craft their own special egg by combining nine Ender Dragon heads!
Description
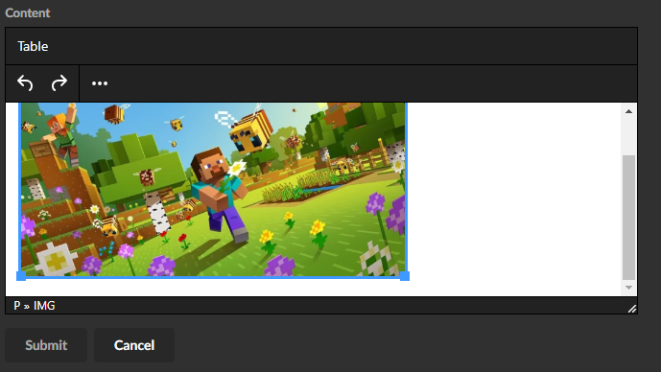
Making your first post on the forum can be a confusing experience. Read on to learn how to start a new topic and add images to your posts. Please remember that all images must follow Autcraft rules.
Getting to the Forum
There is a purple navigation bar at the top of our website. The link to the forum is next to the Home button. Click this link.

You should now be in the forum section of our website. There are several categories here for posting. If you aren't sure where your post fits in, just ask! Here is the first section of the forum, however there are many more areas.
Posting on the Forum
For this example, we will be posting a screenshot to share with friends. These types of posts belong in the Personal section of the forum.
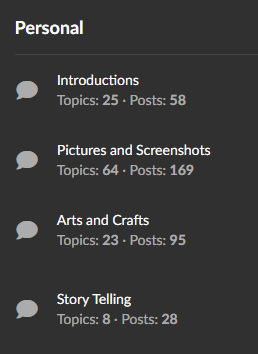
We have a subtopic for Pictures and Screenshots, so that is where we will go to make our post. Once we are in that section, click "New Topic" which is next to the search box.

Clicking "New Topic" will bring up the text editing window, where we will make our new post.
If our post does not include any images, we can write our message in the text box and click submit. We are going to post a screenshot, so we first need to open the menu for extra options. Click on the three dots.
This will open the options window for our post.
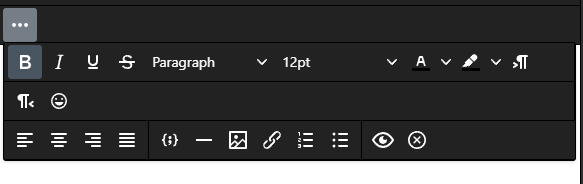
Our options include things to change the appearance of the text, like bold, italic, underline. We can change the text color, font size, and add emojis to our post. We are going to add a picture, so we need to click the icon that looks like an image.
![]()
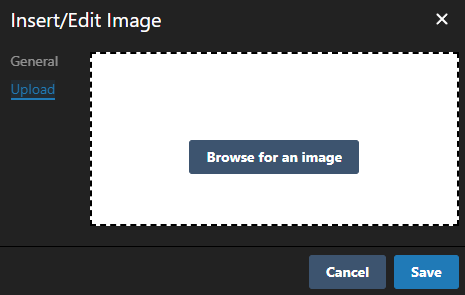
This will bring up a window for us to add our picture. Click the text that says "Upload."
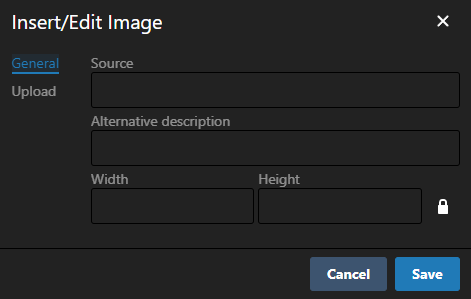
You have two options for adding your picture. You can click "Browse for an Image" and search your computer folders to find the picture. For Minecraft screenshots, they will be found in the Screenshots section of your Minecraft folder. If you need help finding your folder, ask in chat!
The second option is to drag and drop the file directly into the white box. If your picture is saved to your desktop, this is the easiest option.
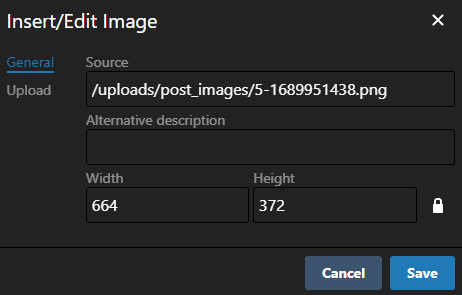
Once your image has been added, you will automatically be returned to the General section so you can edit the image size. If you aren't sure how big you want it, just click Save. The size can be edited later as well.
Click Save and see how your picture looks in the post.
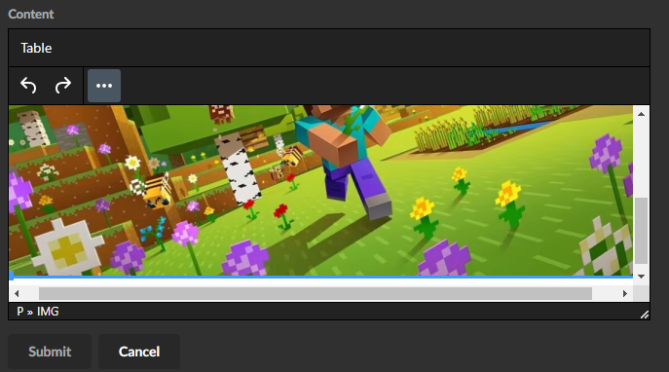
Oh wow! Our picture is very big. We will need to make it smaller. There are two ways to do this. One is to click and drag the blue squares in the corners of the image. You can use these to make the picture bigger or smaller right in your text box. If you have a specific size you want to make the picture, just click the image, and then go back to the image uploader. It will show you the size for the selected picture and we can edit it.
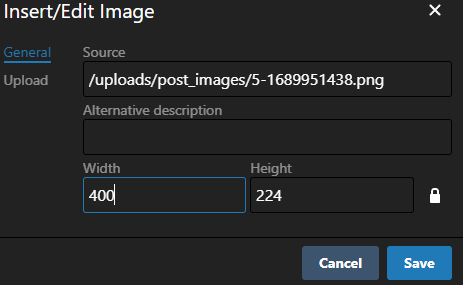
We have adjusted the width of our image to 400 pixels wide. For reference, most of the images in this wiki page are also set to 400 pixels wide.
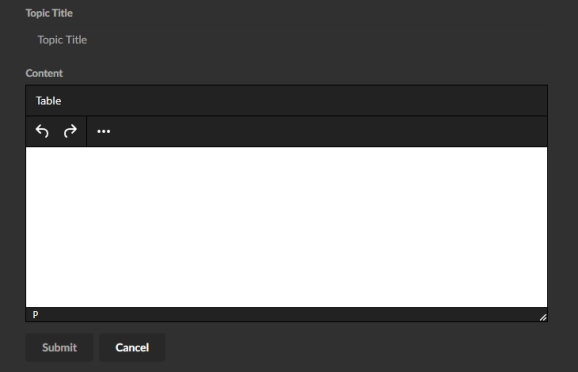
There we go! Our picture fits much better now. All we need to do is add some text and a title. The Topic Title is located above the text box. When you are finished, click submit and check our your very own forum post!
Description
Installing resource packs is quite simple once you know where to put the files. read on to find out more.
Choosing A Pack
The first step is to download your desired resource pack. Autcraft allows any pack that does not provide an unfair advantage. The best example of an unfair advantage would be any packs using X-ray. Texture packs that change how blocks look, or resource packs that change music and paintings are fine.
These packs can be found in many places, such as Planet Minecraft or CurseForge. It is up to you to determine the safety of the website you are downloading from. If you aren't sure, please ask an adult or a trusted friend. After downloading your chosen pack, do not unzip the file.
Where To Place the Pack
Whether you are on a Mac or a PC, your game was installed with a special folder for resource packs. If you do now know where this folder is, the easiest way to locate it is through the game itself.
Using Your New Pack
Back in the resource pack page in the Minecraft options menu, you will see there are two columns. The "Available" column shows any resource packs you have that are not currently being used. This is where your newly added packs will be. The "Selected" column lists resource packs that are currently in your game. To move a pack, simply hover over the icon and click the large right or left arrow. All packs in the right column will be active in your game.
Some packs may have an alert saying it was made for a different version of Minecraft. This does not mean the pack will not work. While sometimes this may be the case, most often the resource pack will work just fine.
Common Questions
Description
Optifine is a mod that helps players with fps, rendering, and additional add-ons.
How To Install Optifine
Note: Autcraft is not responsible for the actions and creations of Optifine. Download and install and use at players discretion advised. Please have adult supervision when downloading or installing.
Capes
Optifine Capes are a staple in the plugin, to get one you have to donate 10$ To optifine, We suggest it's your decision if you want to get a cape or not. ''Autcraft is not responsible for the actions and creations of Optifine, Download and installs and use at players discretion advised.
Note: Optifine Capes Must Be Autcraft Appropriate and family-friendly. Those who don't comply must change capes or remove it.
Optifine Capes can have a banner pattern on the back, a specific Optifine Logo, and different colors. To use the banners you need to copy the last part of the URL of an alternate banner-making website.
How To Change Capes
Cool Cape Designs
Alternatives
Optifine may not be the best option for everyone. It adds some custom features players may not like and does not give enough performance boost to be worth. Some other options similar to Optifine are: Sodium, Lithium, and Phosphor along with others on our approved mods list.
We have an Autcraft-exclusive plugin that makes creating and removing item displays easy for everyone!
What is an Item Display?
An item display is a form of entity display, which was a new feature with Minecraft 1.19.4. These displays are created with some code that is stored on the server and sent to your client so it shows you an image of something that isn't actually there! Item displays generate zero lag. This allows us to place items all over the server without the use of item frames and armor stands, which greatly reduces overall lag on the server.
To learn more about lag, please see https://www.autcraft.com/wiki/lag/
How to Place an Item Display
The main command to type is /itemdisplay
Once this is typed, all you need to do is tab through the remaining options and hit enter!
The command works by selecting to create, choosing the item, and then using either the default size (item frame size) or actual block size (large).
For example, a full size birch log display would be entered as:
/itemdisplay create birch_log large
While a birch log sized to replace an item frame would be typed:
/itemdisplay create birch_log
Here are those two displays for size comparison:

Using the default size displays to replace item frames in a storage room could look like this:

These item displays will rotate to always face the viewer. To create a display that will show in one fixed direction without moving, use this command:
/itemdisplay create item_name fixed
Replace "item_name" with the name of the item you wish to display. Such as birch_log in the previous example. This display will set to the direction you are currently looking when the command is entered.
A trick for centering these displays is to /sit on a block to center yourself, then use the shift key to stand. You can also adjust the height of displays by placing and standing on layers of snow.
The list of items to choose from comes directly from the Minecraft database, and all items are listed in their data form. To find out what an item is called, make sure you have Advanced Tool Tips enabled (F3+H) and hover over the item in your inventory or in the crafting menu. As you start to type the item, the plugin will automatically filter the options and then you can tab through, much like when sending a message to a player in chat.
How to Remove an Item Display
Since the item displays don't actually exist on the server and we can walk right through them, how do we remove them? With the shift key! Simply pressing shift while right-clicking the display will remove it from view. This is accomplished through the use of hit boxes. If you struggle to remove the item, enable hit boxes with F3+B and click somewhere inside the box. Using hitboxes will also show you where to click on chests if you have used item displays as storage labels. When using the default (small) size item displays, this hit box should be no larger than an item frame. This means we can still open chests as always, as long as we click on the edges of the chest to avoid the hitbox.
Limitations and Guidelines
Item displays can only be placed within protections that you are a member of. This means that you are either the protection owner, or the owner has added you to the protection. You are not able to place outside of your protection, including unprotected areas in the build and resource worlds.
Each player is currently limited to 500 item displays. This is a brand new plugin and we are still testing to make sure there are no issues and this doesn't negatively affect the server. Assuming we don't run into any problems, this limit may be raised in the future.
Players are only able to remove item displays that they placed. You cannot remove a display from your protection that another player placed. Please ask them personally if they can remove it. If you run into any issues, speak with a staff member or submit a /modreq.
All item displays must follow Autcraft rules for safety and appropriateness. If staff determine that an item display or combination of items does not meet these guidelines, your display may be removed.
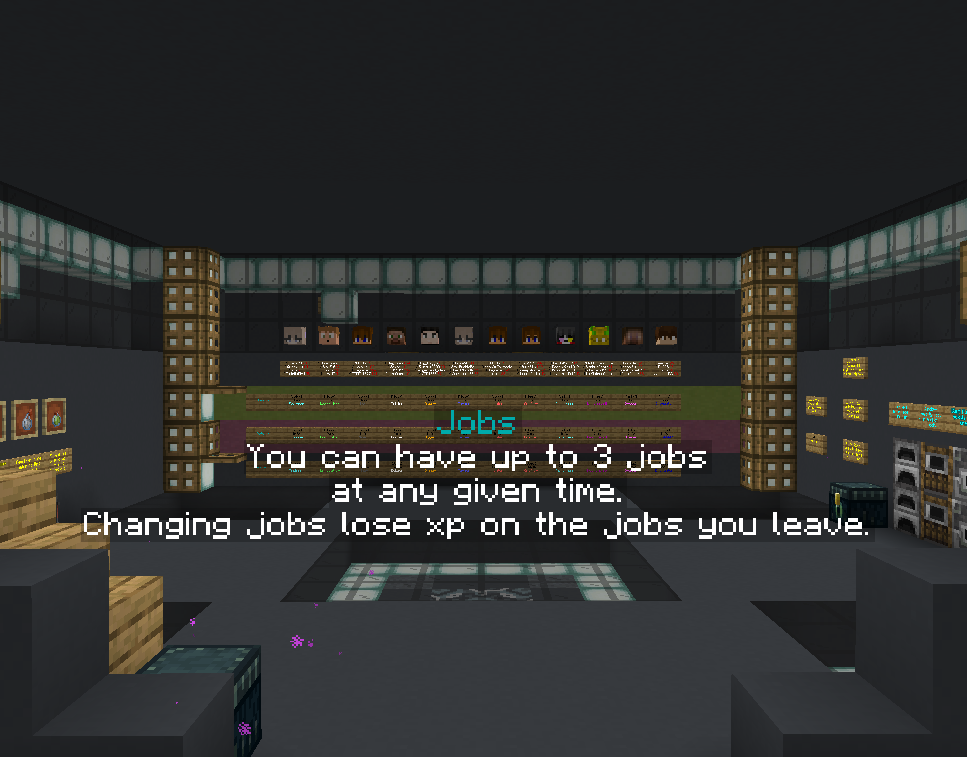
Description
In our /warp jobs room, you can sign up for up to three jobs that allow you to earn in game currency ($), job experience (exp) and jobs points (points) while playing the game. For more information on which jobs are available, please go to Wiki - Locations - Jobs Room.

In Game Currency
Performing job actions earns in-game currency. The amount of money earned can be seen with the commands /bal, /balance and /money. This money can be exchanged for emeralds at The Bank at /warp shops.
Jobs Points
To see how many jobs points you have created, you can do /jobs points. On Autcraft, 10,000 jobs points equals 1 credit. You can convert your points into credits by using the command /jobs shop. You can use credits to buy things on the Autcraft website store, such as spawn eggs, ranks, decorative heads and much more.
Jobs Experience
The more you do your jobs, the more experience (exp or xp) you get. This helps you move up jobs levels and get new job titles, which allows you to earn more money and jobs points each time. These are the same job titles that Villagers move through as they trade.

The job titles are as follows:
- Novice (from level 0)
- Apprentice (from level 25)
- Initiate (from level 50)
- Journeyman (from level 75)
- Adept (from level 100)
- Master (from level 125)
- Grandmaster (from level 150)
- Legendary (from level 175)
You will get a message similar to 'You are now A Miner' or 'You are now J Fisherman' when you reach the level.
Quests
Each job you join offers quests which allow you to earn more money ($), jobs points or in some cases, whole credits.
When you type /jobs quests, a box will appear in your chat box listing the available quests for your jobs. When you hover over the title of the quest, it will give you the information on what you need to do and what your reward will be for completing it.

Once you have completed your quest, you will get an automated message to let you know that the points or money have been added to your account.
Description
Player Particles is a plugin on Autcraft where players can make unique sets of particles. There are thousands of combinations for players to use using styles and different particle effects. This page will list the effects, display the styles, and walk you through how to set your own particles in the game.
Effects
Effects are animations in the game, such as flames, dust, or enchantment table. These are mostly used particles inside Minecraft and you can harness the power for a unique display. Effects must be purchased from the Autcraft store. Examples of each effect are displayed in the store.
Styles
Styles are how your chosen particles are displayed. All of these styles are free to use and are not purchasable.
Current styles and example gifs (directly from the plugin developer. not all styles are displayed):
Arrow
Batman
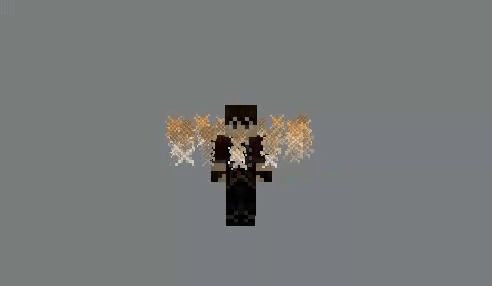
Beam
BlockBreak
BlockPlace
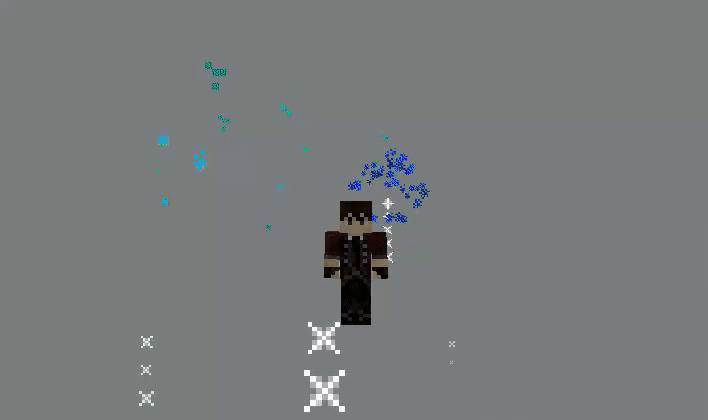
Celebration
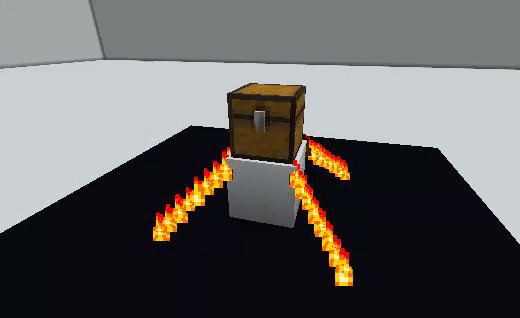
Chains
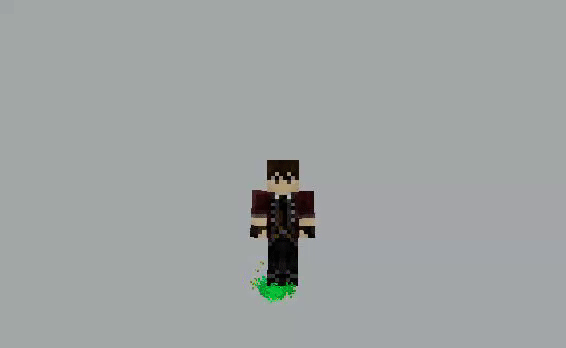
Companion
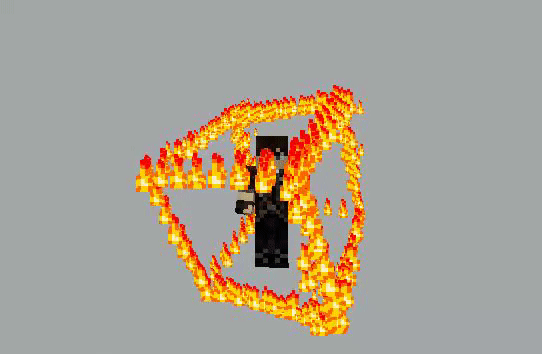
Cube
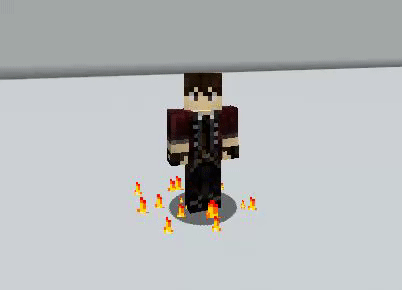
Feet
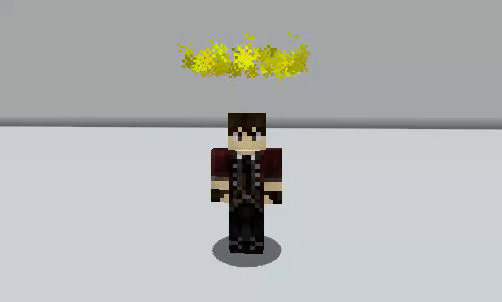
Halo
Hurt
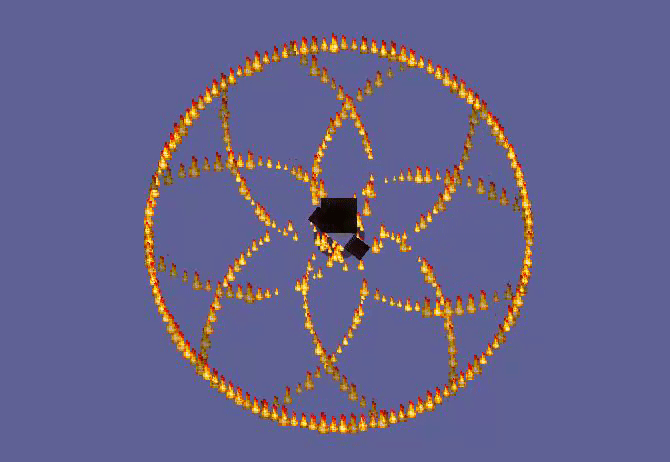
Invocation
Move
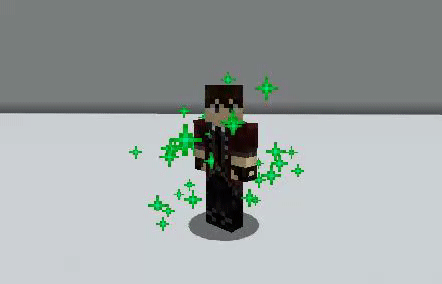
Normal
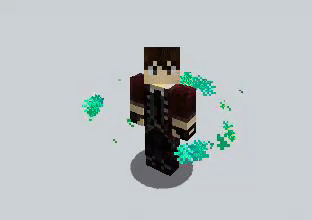
Orbit
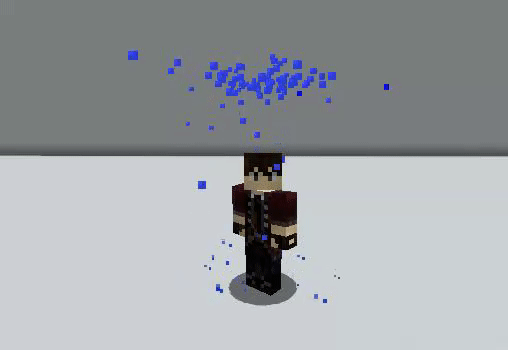
Overhead
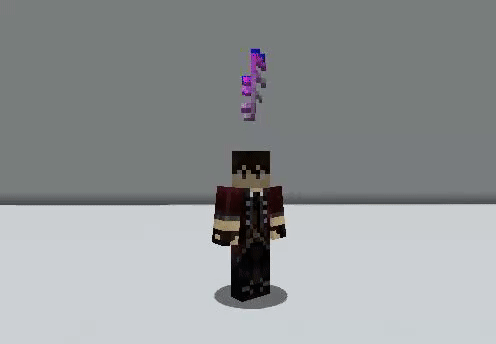
Point
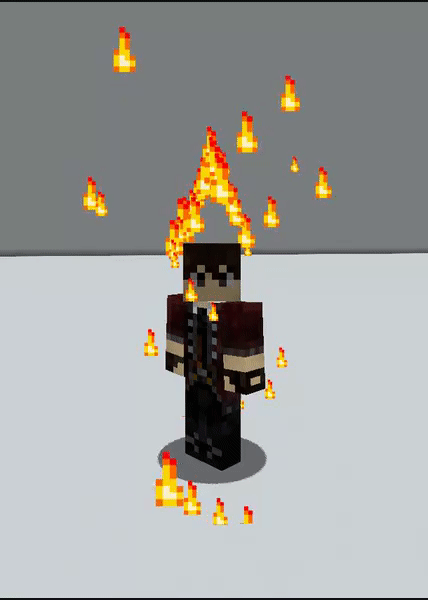
Popper
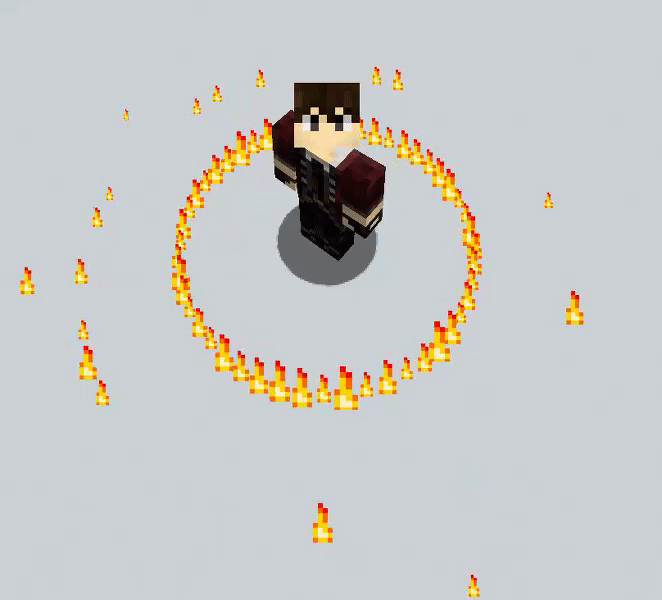
Pulse
Quadhelix
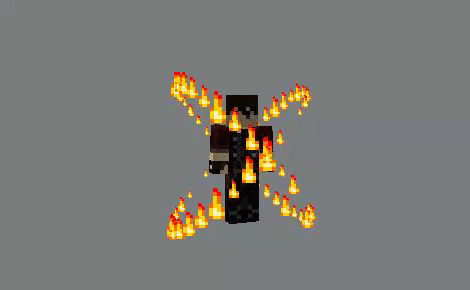
Rings
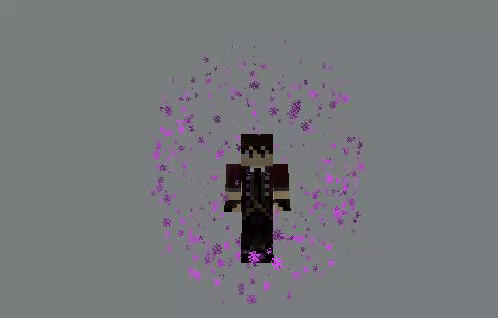
Sphere
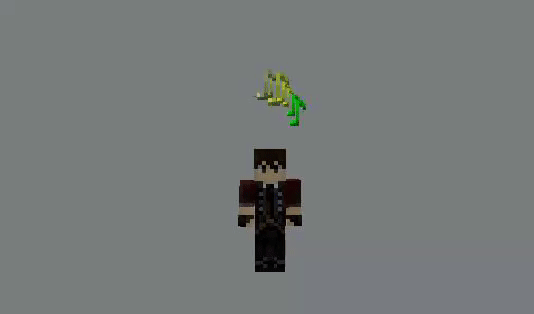
Spin
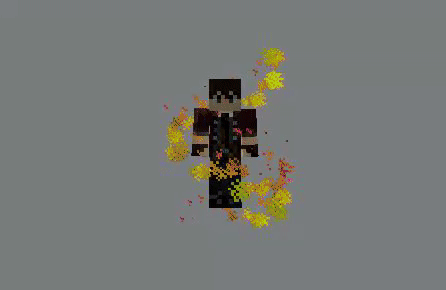
Spiral
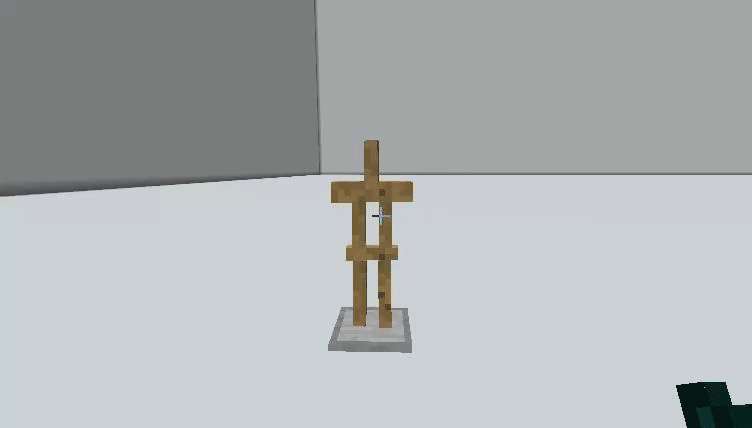
Swords
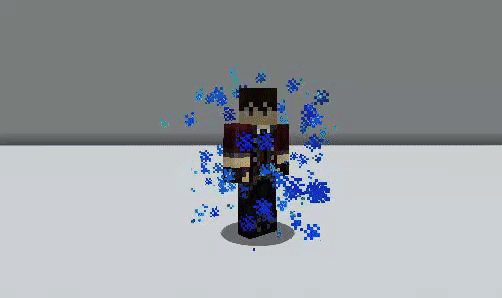
Thick
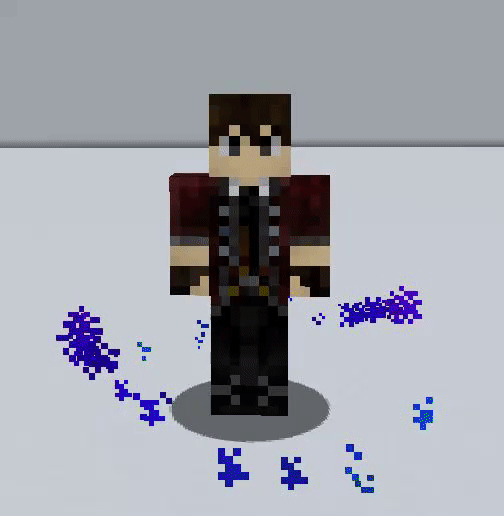
Twins
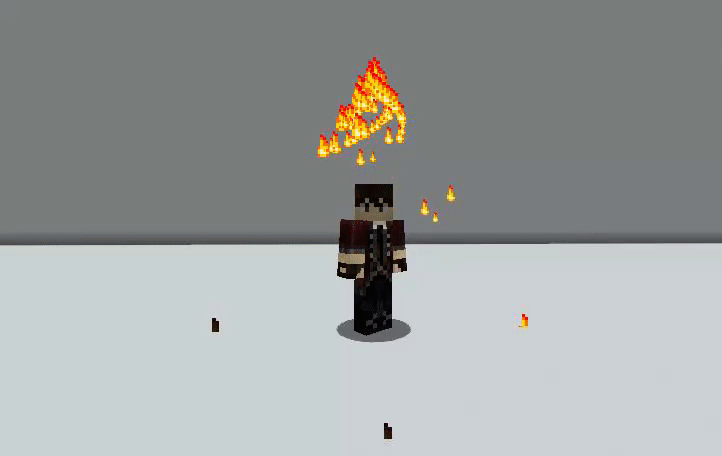
Vortex
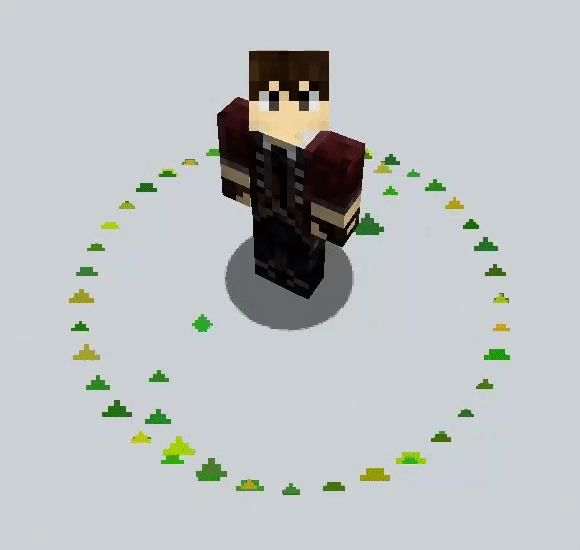
Whirl

Whirlwind
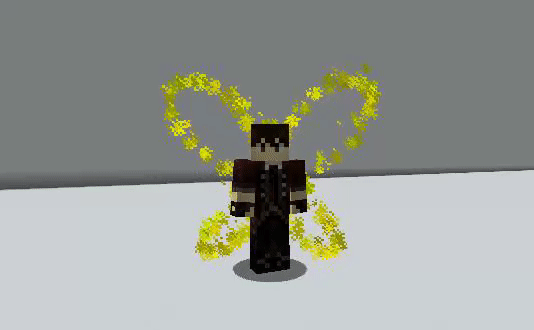
Wings
Some particle effects have data that can be applied to change the color. You can see which effects use color data by doing
Example, using "dust" effect:
/pp data <effect>
/pp data dust
Example using the effect "dust," style "celebration" and the color pink
RBG: /pp add dust celebration 253 128 174
Hex Code: /pp add dust celebration #FD80AE
Color Name: /pp add dust celebration pink
Particles can be managed using commands, or by using the graphical user interface, or GUI. to access the GUI type /pp
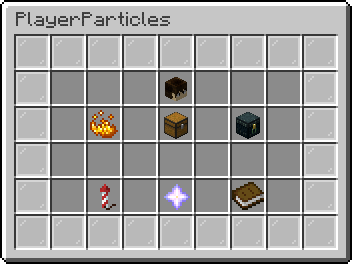
Manage your particles (blaze powder)
In this section you are able to create, edit, and delete your particles. This page will display an enderpearl for each existing particle group you have (you will have none if this is your first time creating a particle group). Choose the book icon to create a new particle, or the barrier to clear all items and start over.
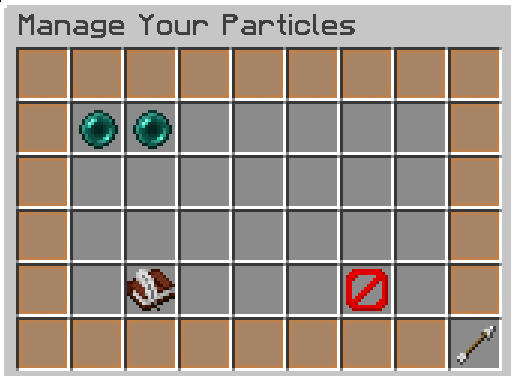
On this page, select a particle effect. You will only see effects that you have purchased from our store or any default options. Upon choosing an effect, you till automatically be moved to the next page.
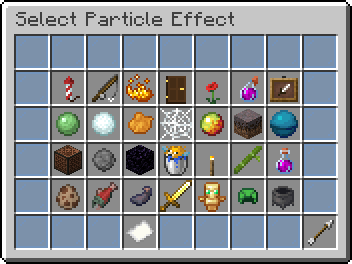
Particle styles are how your chosen effect is displayed. Examples for most options were near the beginning of this page. For most particles, this is the last thing to select. A few options will have a third page for choosing particle data. For us, the data is the color.
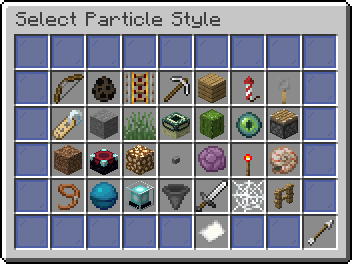
Here you can select the color for you chosen particle. For more information on particle data, scroll back up to the "Data" section.

Your first particle will be "Particle #1. You can layer particles, and they will be numbered sequentially. To edit a particle, click the enderpearl. Hover over the pearls for a description of each particle. The editing page allows you to change the style, effect, or data.
Particle Groups
One you have created your particles, go back to the first page labeled "Player Particles" and click on the chest.
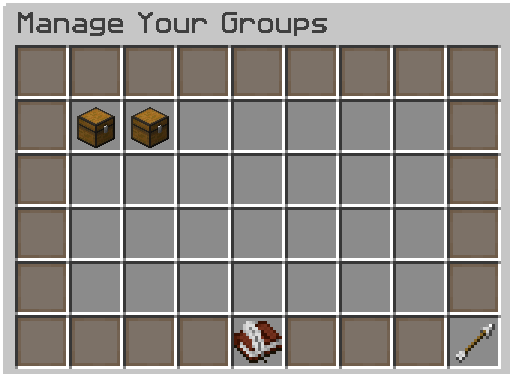
To save your current particles, click on the book and quill. You will be able to name your groups in the text box. Once saved, they will appear as a chest. In this image, two groups have been saved. Click a group to begin using those particles. This will allow you to switch back and forth between different particle group sets.
To create a new group, first, make sure your current set is saved to a named group. Next, go to the very first page that opens when you type /pp. This will display your current particles. To remove a particle, shift + click. (Don't worry! Your group will still be saved. This process creates a new group). At this, point, you can scroll back up to the Edit Particle section to continue.
Players on Autcraft can make shops to sell items at any price.
To begin setting up a shop, place a container near the location of the shop. The container must be recently placed. If there is already a container, it must be broken and placed again. Containers include chests, shulkers, and barrels. For the remainder of this article, containers will be referred to as "chests."
While holding a stick, right click the desired chest. The stick will now be used for shop type and appearance selection.
Shift and right click the stick in the air (so no block is selected) to select shop appearance. Options are:
All shop appearance options function the same way. There is no benefit for having one over the other, other than for cosmetic reasons.
Next, right click the stick into the air without crouching (no shift). This will cycle through the shop types:
Now you will choose how you want the shop to look. Shift and then right click the stick into the air once more. The options are:
After selecting both the shop type and appearance, use the stick to click the location where the shop should be placed. All shop types can be placed on the ground. Signs shops may be used anywhere a sign can be placed.
Place the items to be sold into the shop chest. For this example, there are End Crystals and Nether Stars:
Shift right click the shopkeeper or sign to enter the Shopkeeper Editor:
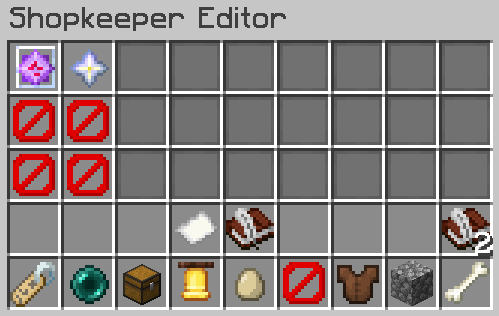
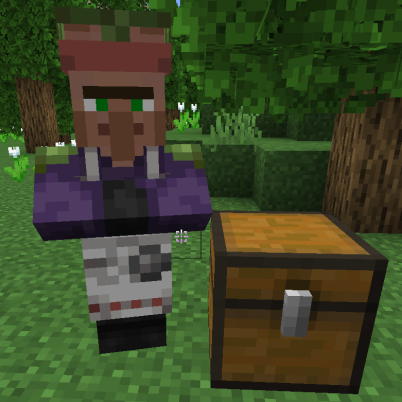
In a selling shop, all items are sold for emeralds. The top row of the editor displays the items for sale. The second row is for setting an emerald block price, and third row is for individual emeralds. The maximum number for both is 64. If the price totals 20 emeralds or less, the price will be set in emeralds only (no blocks). If the price totals more than 20 emeralds, the price will be set as as many emerald blocks as possible, and emeralds for the remainder. Left click the null symbol ∅ to increase the price by one emerald or block. Shift and left click to increase by 10. Right click and shift right click will lower the number. To stop selling the item, reduce the cost to zero and remove the item from the shop chest.
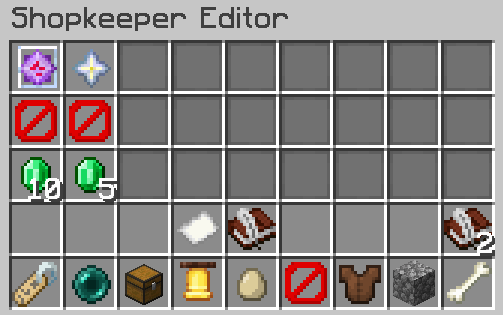
In this example, the End Crystals are set to 10 emeralds and the Nether Stars are set to 5 emeralds. This is how they are displayed to players using the shop to buy items:
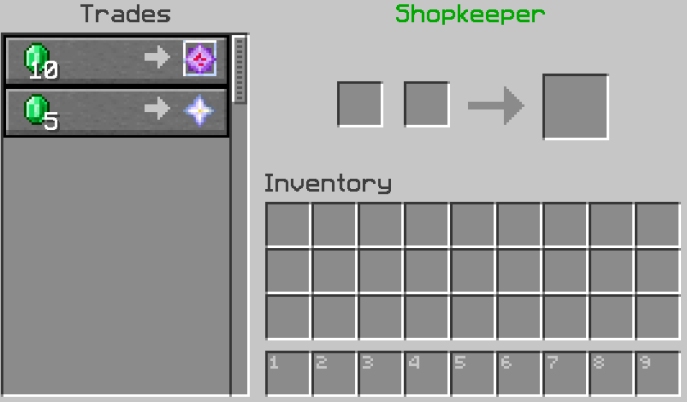
This shop works the same as a selling shop, however the shopkeeper will give emeralds (not blocks, so a maximum of 64 emeralds) to players in exchange for the desired items. Place one of each item to buy in the chest, as well as emeralds to give players in exchange.
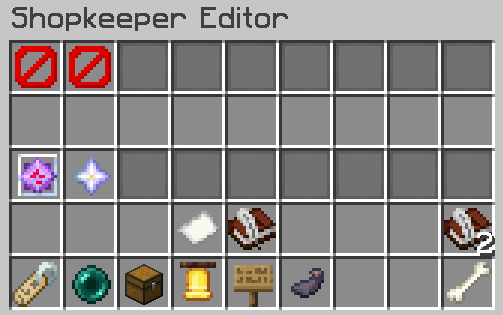
Left click the red null symbol ∅ to set the number of emeralds players will be given in exchange for the desired item. In this example, shoppers will give an End Crystal in exchange for 64 emeralds. The shop screen displays like this:
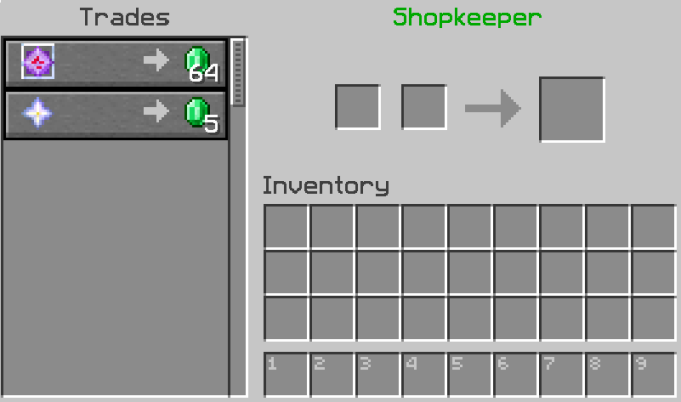
This shop allows players to sell or buy things for more emeralds than the selling or buying shops allow, or for a currency other than emeralds. For example, a common currency on Autcraft is diamonds. Place one of the item to be sold in either the top row of the shopkeeper or in the chest, and the item(s) to be traded (such as diamonds) in the 2nd and 3rd rows of the shopkeeper. In this example, End Crystals will be sold for Nether Stars. Left or right click to set the quantity for each.
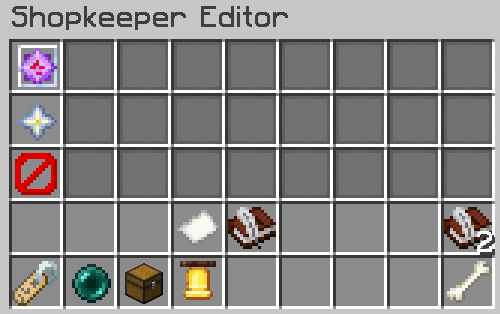
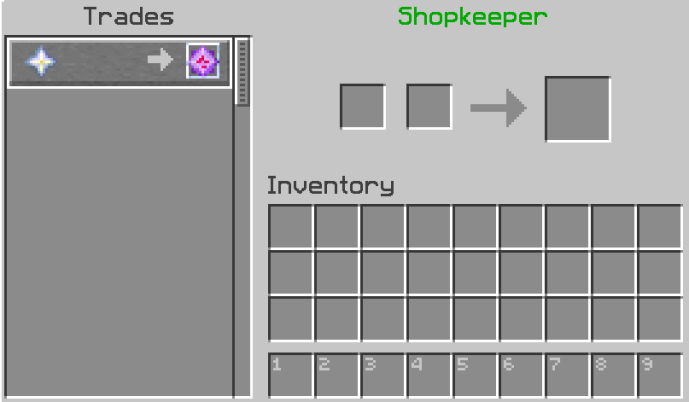
Place the signed book (or books) into the chest along with blank book and quills.
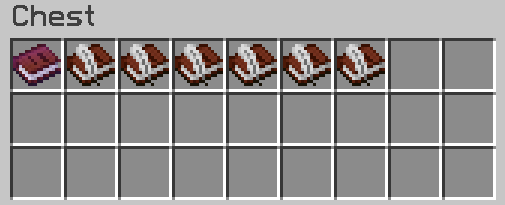
In the Shopkeeper Editor, the books will appear in the top row. Use the second and third rows to set the price with emeralds or emerald blocks. This process works identical to a trading shop.

When books are purchased, the blank book and quill will turn into a copy of the selected book.
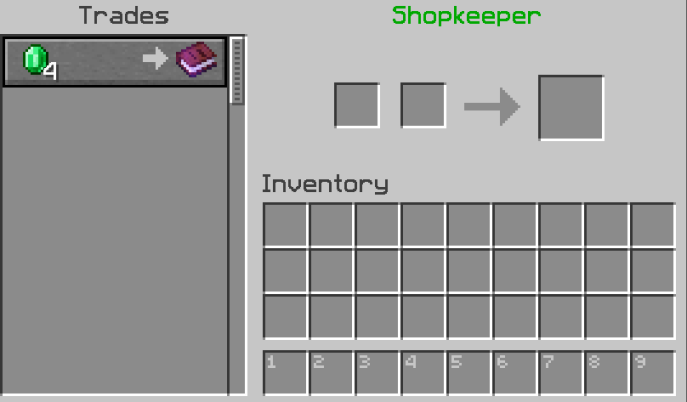
Beacons can be used for more than their special effects. They are also excellent sources of light and can be used to display colors and patterns. If you are not familiar with activating beacons, first visit our page on Beacons.
The color of a beacon beam can be changed by placing either block or pane of glass above it. Shift + left click to place the block.
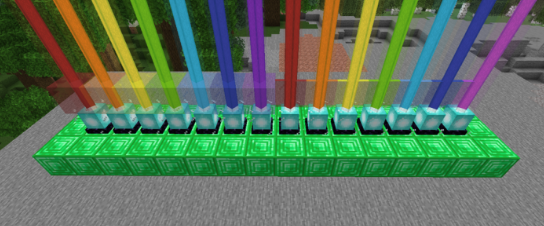
Multiple colors of glass can be placed in different orders in order to change the colors and create a gradient effect.
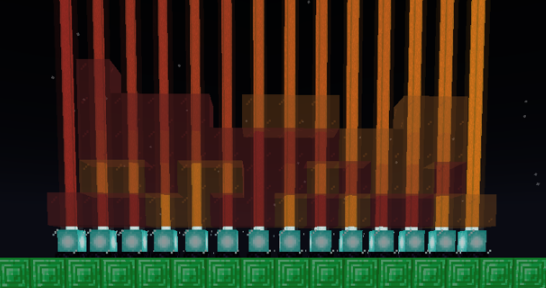
Glass can even be used to create images in the sky, such as this display in the Village of Boos.

What will you create with your beacons?
Special codes can be used to change the appearance of signs
Signs can be crafted using any wood type. Six matching planks and one stick will craft 3 signs. Each sign can display four lines of text. Each line has a width limit, however due to varying character length, there is no set number of characters that can be used on each line. For example, "O" is wider than "I."
Signs can be used in many ways. They can label the contents of containers, display ownership of items or builds, or be used with the /lockette command.
Players can easily change the color of sign text by tapping the sign while holding dye. Another way to change appearance is by using special codes. There are a variety of codes that can be added to signs to change their appearance. These codes affect the color and formatting of the text. The color code must come before the format code.
How to Use Sign Codes
As a reminder, color codes must come before format codes. There does not need to be a space between the code and the text. Here are some examples:
Hello!
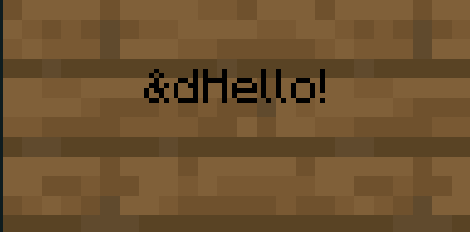
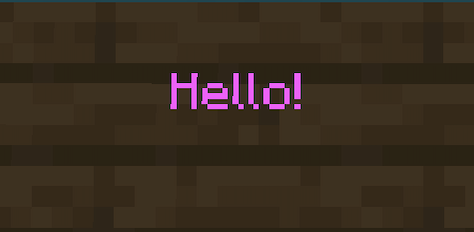
You can use a different color for each line of text!
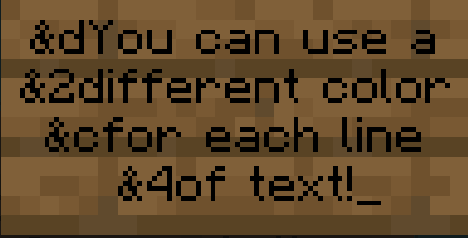
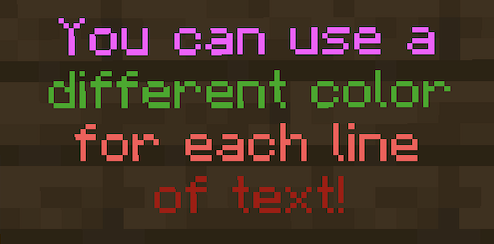
Or each letter!
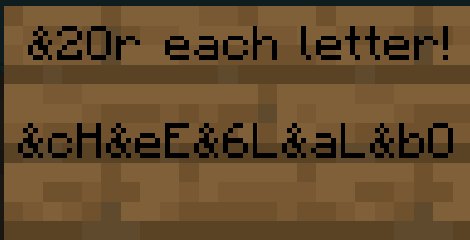
We can make words BOLD or italic
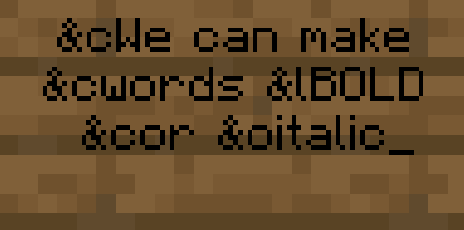
We can also change the glow color
Tap the sign with glow ink. A white glowing outline will appear.
Then tap the sign with dye. The color formatting will remain, but the glowing outline will now appear in the selected color.
Smithing templates are an exciting new feature in 1.20 that allow players to customize their armor with designs and colors. These templates are also required for upgrading diamond armor to netherite. Read on to learn more.
Smithing Templates
A basic smithing template is required in order to upgrade diamond armor to netherite, or to add armor trim designs to existing armor. Each design is created from a specific smithing template. There are 17 smithing templates, 16 with designs, and they can be found in various areas around Minecraft. The locations of each template are listed below with the images of the designs.
Making Copies
With Smithing Templates being somewhat difficult to locate, be sure to take advantage of the copying feature. Templates can be copied by placing the original template, 7 diamonds, and a specific block onto the crafting table. The resulting items will be the original template plus a new copy. The specific block needed depends on the template you are trying to copy. In the examples below, Rib requires a block of netherrack, while Tide requires prismarine.
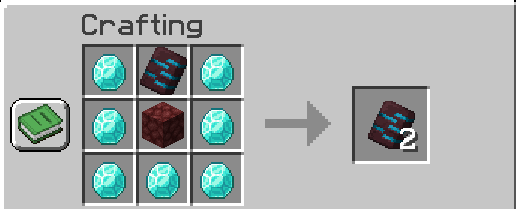
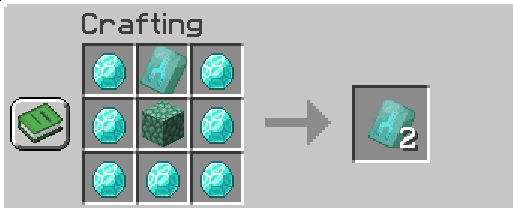
Available Templates
To see these designs in person, visit the Armor Trim Room at /spawn, which is near /warp jobs.
Upgrade
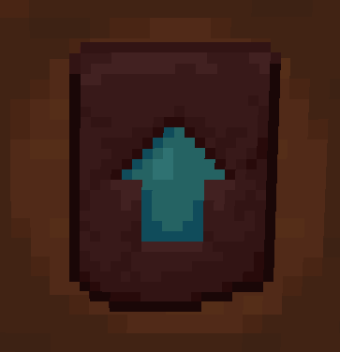
Sentry
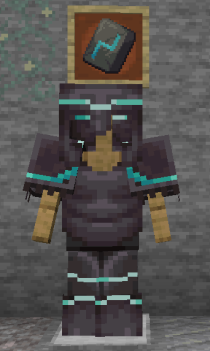
Spire
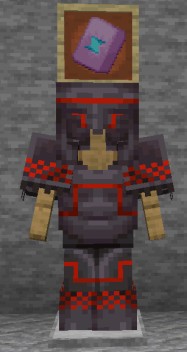
Tide
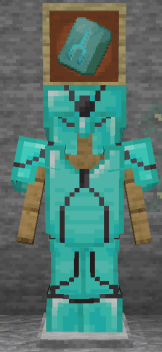
Wayfinder
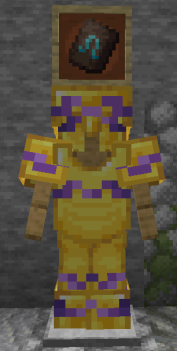
Wild
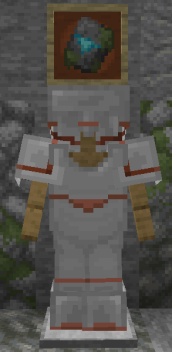
Coast
Eye
Raiser
Ward
Shaper
Rib
Dune
Snout
Host
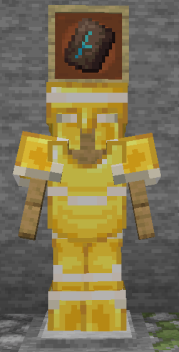
Vex

Silence
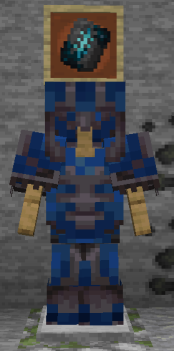
Trail ruins are a new structure added in 1.20. These are part of the new archaeology gameplay, and require careful excavation to uncover the buried structure as well as retrieve the hidden treasures within.
About Trail Ruins
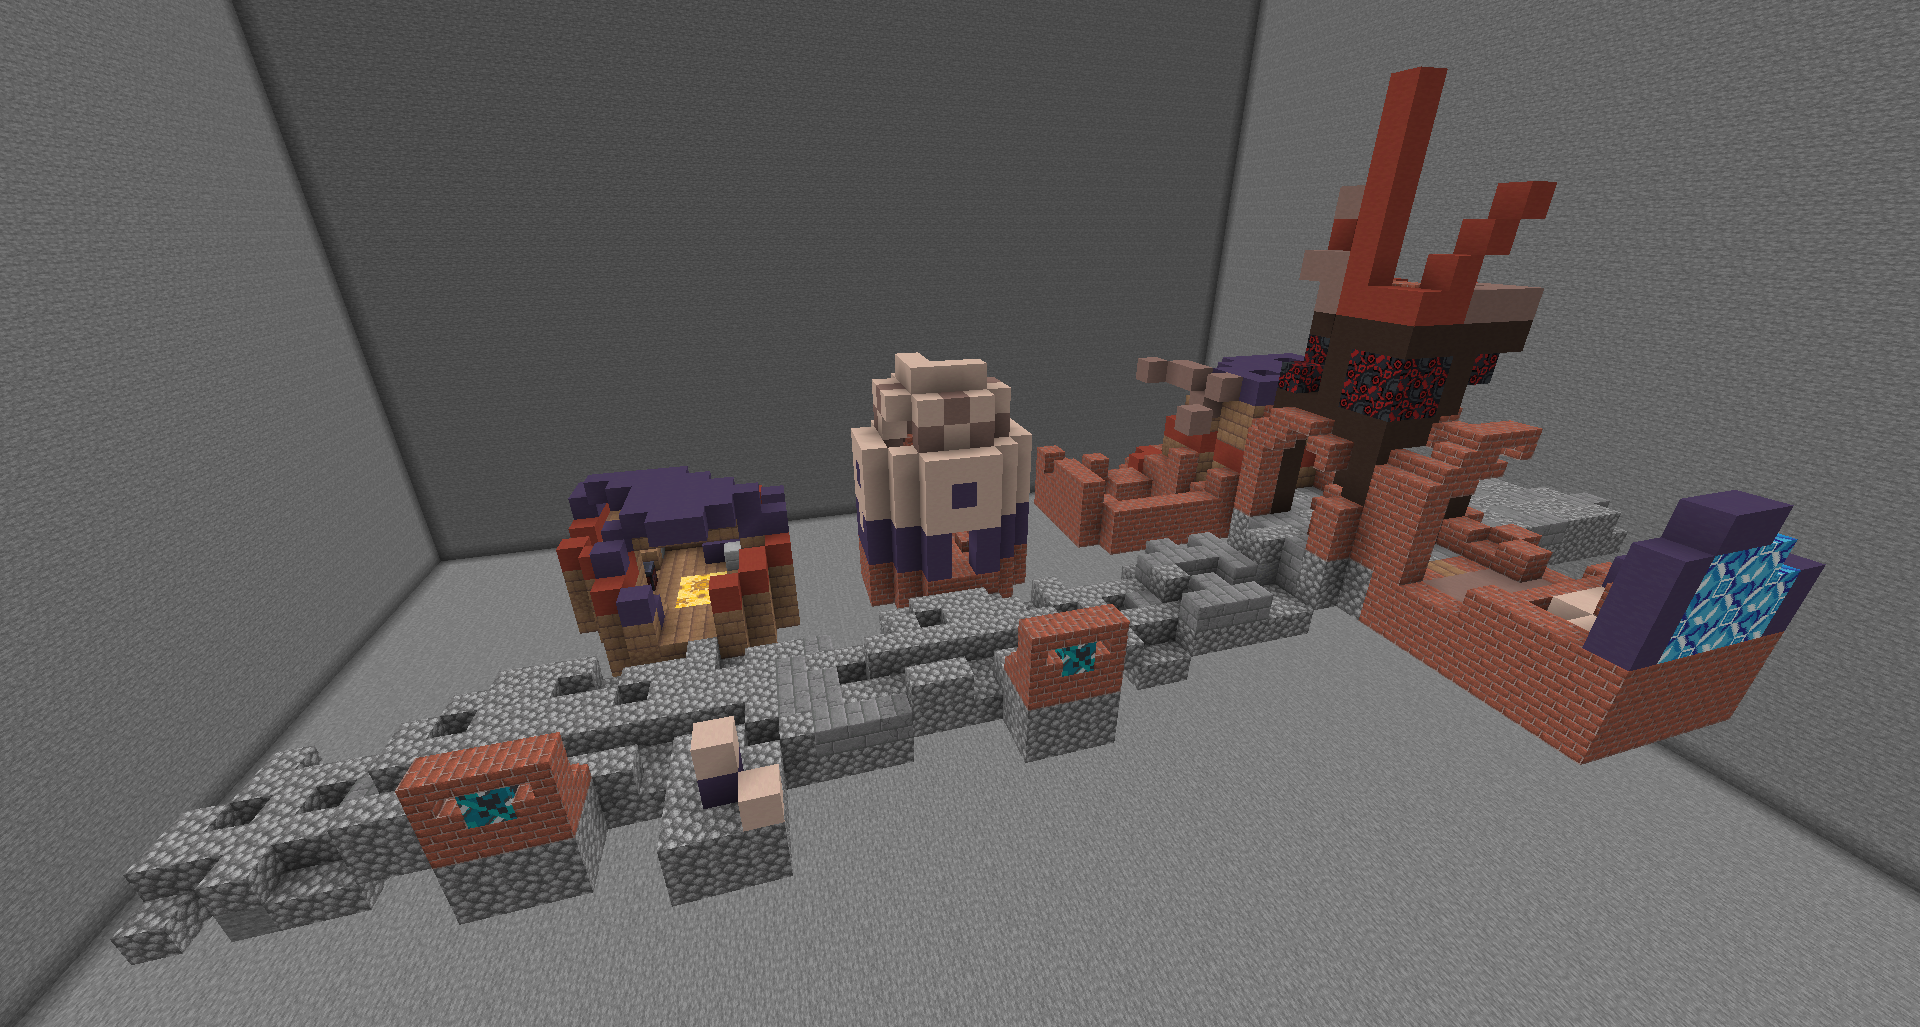
The above image shows a fully excavated trail ruin. They are randomly generated and each one will be different in size and shape, however they all share similar characteristics. They appear to be an ancient terracotta village, sometimes including the paths taken between buildings, as well as workbenches that past villagers may have used.
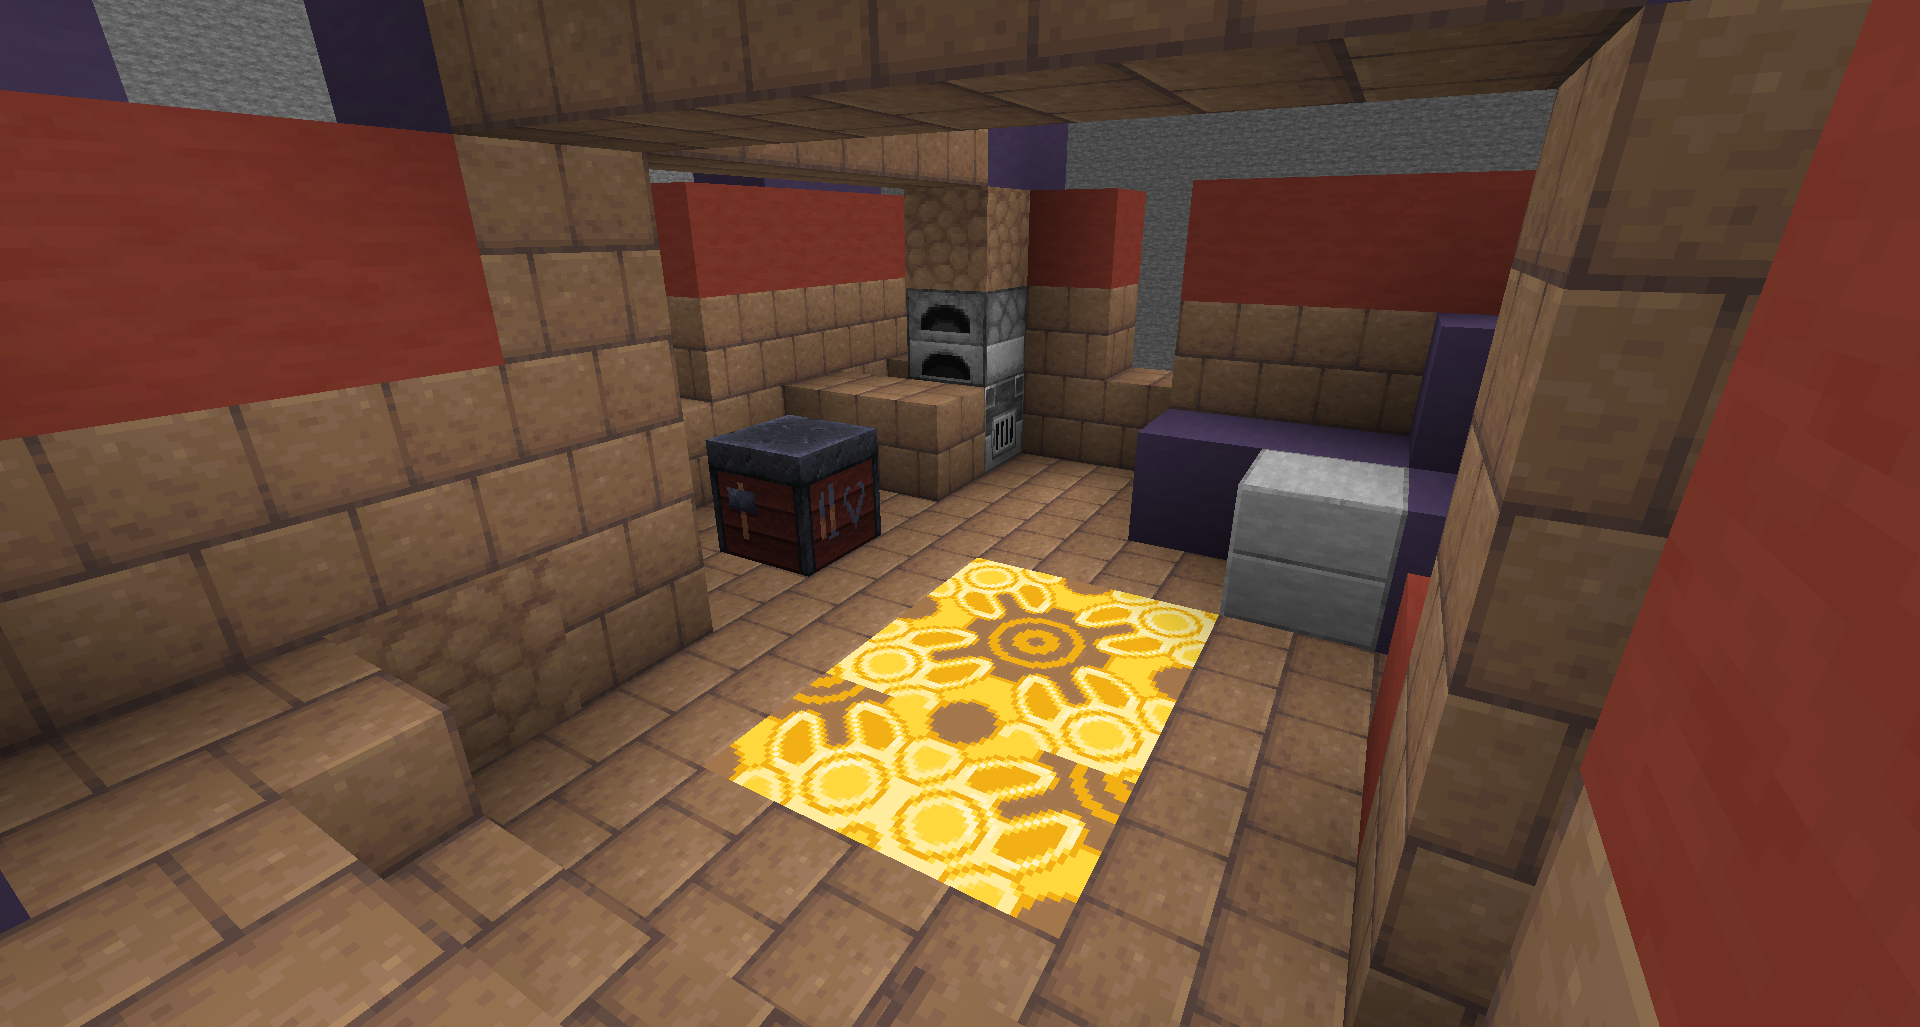
Locating a Trail Ruin
Ruins can be found in taiga, snowy taiga, old growth taiga, old growth birch forest, and jungle biomes. They are quite difficult to locate, with only the very top peaking through the surface of the biome, as seen below:
That single red terracotta block was the only visible sign of this trail ruin, which was found in a jungle biome. Carefully breaking the blocks around it will begin to reveal the full structure.
Excavating the Ruin
While mining out the ruin, keep a close watch for suspicious gravel. Use your brush to carefully sweep the gravel away and find the ancient artifacts inside. In this particular ruin, we found these items:
This is just an example of the types of items that can be found, as each ruin is randomly generated. Many workbenches can also be found in this ruins. This particular site contained a furnace, blast furnace, smithing table, and crafting table. Other ruins have held looms, grindstones, and cartography tables. You never know what you're going to find!
Description
Autcon is an annual event based loosely around the famous MineCon. As children with Autism often struggle with social settings, Autcraft allows them to generate friendships, bonds and be social without being in person. Autcon helps them one step further by having them meet ''in person'', whilst being entertained by games and activities, and work on those in-person social skills.
Autcon Brisbane 2015
In 2015 the first Autcon was held in Brisbane, Australia. However small it was, Autcon was a success. Games were played, new friendships forged, barbecue lunch was provided and the members each left with a 'goodie' bag full of things to take home.
AutconUK 2016
In August 2016, Autcon was held in two locations, firstly in Liverpool, England, and was the first UK based Autcon. This was organized by SparkleTwinnie & TheHemikoWay, with help from TheDonster & DaisyBoo.
Autcon Sydney 2016
Autcon's second 2016 location was in Sydney, Australia and was hosted in the September. LadyCath hosted and organized this event.
AutconUS 2017
In 2017, Autcon was held in three locations, two of which were in the United States. Washington, D.C. and Atlanta, Georgia hosted these events.
AutconUK 2017
Also held in Liverpool AutconUK was organised by SparkleTwinnie and the AutconUK team, the event was held in the Harrington Center, Formby on Saturday 12th August.
AutconUK 2018
Held in Liverpool for a second time, AutconUK was organised by SparkleTwinnie and the AutconUK team, also the first Autcon with special guests AutismFather & WizardKeen! the event was held in the Harrington Center, Formby on Saturday 1st September.
AutconUK 2019
Held in Liverpool for the final time, AutconUK was organised by SparkleTwinnie and the AutconUK team. AutismFather couldn't make it to this one so he video called instead.
Autcon 2020
Autcon was not possible to arrange because of the pandemic and following lockdowns.
Instead, it was arranged online on Autcraft. Over 100 players visited, and AutismFather livestreamed the whole event. The staff built a specific arena with lots of booths with minigames and contests.
Autcon 2021
This event was also held online due to the pandemic, with brand new arena built for the occasion.
Autcon 2022
The 2022 event was again held online. The staff created builds around the theme Big Gaming. Mazes, games, and elytra jumps were created within larger-than-life versions of Minecraft mobs and blocks.
Autcon 2023
With the great success of the 2022 area, it was decided that we would continue to build upon the existing area to add more mazes and games. Special treasure hunts were held throughout the day.
Autcon 2024
Autcon was hosted online once again for 2024, with new builds built in the area showcasing the latest mobs and features from Minecraft 1.21. Games and small events were hosted all day throughout the two days that Autcon ran for. The /tr Plugin was unveiled and used for the first time during the Autcon weekend and during that time, two treasure hunts ran to showcase the new plugin in action!
AutconUK & Autcon online 2025
In August 2025, we held our first in-person event since 2019 with AutconUK happening at Techniquest in Cardiff! It was a great event, bringing together around 12 families from around the UK to enjoy a celebration of all things Autcraft. Each attendee got to take home a goodie bag and their own lanyard with their username and avatar on it. At the same time, we held Autcon online again, showing off the new mobs added to the game in 1.21.7, with a Creaking Heart maze, a Happy Ghast race arena and a revamped dance area! Collectibles included special heads and spawn eggs to spawn in the new biome-variant mobs like chickens, cows and pigs.
Autism Awareness Day
Description
After starting Autcraft, it became painfully obvious that the bullying problem facing all people, but especially Minecraft players that have autism, was far more severe than anyone ever realized. It is estimated that in the first two years of the server being around, [[AutismFather|AutismFather]] (The owner of Autcraft) was speaking to an average of 2 [[Players|players]] per week that were feeling so depressed that they had considered suicide and that was primarily due to bullying. It was this overwhelming build up of emotions that prompted the writing of the Plea to the Minecraft Community.
2014
The first annual Plea to the Minecraft Community came prior to April 2nd where it was requested that all players within the Minecraft community stand up to bullying. Many players responded positively.
Some players created videos, they can be seen below:
2015
The second annual Plea to the Minecraft Community consisted of a live stream in which several famous YouTuber Minecraft players not only hosted and participated in the stream, they also visitors!
Videos of the live stream (not playable in all countries) can be seen below:
2016
Videos of the live stream (might not be playable in all countries) can be seen below:
2017
Videos of the live stream (might not be playable in all countries) can be seen below:
2018 World Record Attempt
Videos of the live stream will be put up soon:
Birthdays are a common celebration on Autcraft! Read on to learn how they are recognized.
Players can enter their birthdays using the /birthday command. If your birthday was for example, August 5th, you would type /birthday 05 08. Upcoming birthdays for the week are added to the Birthday Board at Birthday Island, and will be announced at POTW.
On June 23, Autcraft grows one year older! Currently, the server is 12 years old. Each year there are special decorations at spawn and epic wither fights to be had.
Description
The Darkness is an amazing custom mob battle created by AutismFather that can only be found on Autcraft. There have been three versions, with the most current being The Darkness 3.0.
What is The Darkness
The Darkness is an automated Wither fight centered around a Minecraft fox and over 300 command blocks. The fox randomly runs around the arena while the command blocks set off a chain of events such as spawning custom mobs and mob bosses around itself, making spooky sounds, changing the arena walls, floor and roof, creating particles and potion effects on the players, and more. When all of the bosses are defeated, The Darkness (the fox) collapses until it returns again.
Custom Mobs
The Darkness features several custom mobs that were created by AutismFather
Balloons
After all bosses have been defeated, "balloons" are unleashed throughout the Wither Arena. The floating balloons consist of jeb_panda and jeb_sheep stacks on invisible bats, glow squids on invisible bats, parrots, cats, and both regular and screaming goats. This bright and colorful display symbolizes the defeat of The Darkness, and provides a great way for players to collect mob heads.
The Darkness 3.0
Our newest version of The Darkness has been completely reimagined, using the same familiar bosses (plus two new additions), placed into an ever-evolving world of changing floors, structures, and effects. This completely automated fight is also randomized, meaning no one, not even the admins, will know which boss is coming next, and the structures are in different locations each time. Every fight is a completely unique experience! Keeping in mind that the order is different every time, here is what you can expect during each boss segment:
The Darkness 2.0
The Darkness (original version)
The first Darkness fights were shorter and had fewer bosses, however many of the original bosses and mobs carried over into the newest version. The original order of events was:
Description
Autcraft has hosted several visitors to the server, Minecraft players that have a substantial following on YouTube and considered celebrities within the community.
Visitors
Description
This game occurs every Sunday at 6 PM UK time (1 PM Eastern Time, 10 AM Pacific Time, 3 AM Australian Eastern Standard Time).
Rules of the game
Description
Valentine's day is a day dedicated to spreading love and kindness to others, Autcraft has hosted Valentine's day events in the past, The most recent being the Love and Kindness day, 2026.
Autcraft's Valentines Day Hosted Events
Autcraft has hosted Valentine's Day dating back to 2020
2020
The Valentine's day event of 2020 was the Celebration of Love and Kindness 2020. This had parkour, a heart-shaped glass island at Spawn, a dance floor island, a maze, and the Admins gave out valentines.
2021
The event of 2021's Valentine's Day was similar to 2020s with a maze, a dance island, parkour, and an island made out of red glass. The admins also left valentines for others to collect and a unique map art with a photo map art wall. Unlike last year, this event also unveiled a brand new Wither Fight arena with hearts, chocolate, custom trees, a Ferris wheel, and more.
2022
The event of 2022 featured similar events to the previous years. The glass at Spawn 5 was changed to pink and white, and a DJ booth was placed up in the sky near an interactive dance floor in the shape of a heart. A heart-shaped maze, staff dunking booth, and photo backdrop filled out the remainder of the decorations. This year also featured a specially created resource pack which changed the in-game discs to play music all about friendship, and changed the game paintings as well! Each player received a special map art and a decorative head to remember the event.
Description
Wither Fights are an event that Autcraft Admins hosts on the server from time to time. You never know when one may happen.
Wither Fights grew over time to include Giants (huge zombies) and expanded even further to include just about every mob there is in the game, including bizarre combinations of mobs such as witches riding bats and evokers riding sheep.
Introduction
Wither Fights first started taking place on the server back on August 17th, 2013. These fights took place in a secluded location within the world where no damage would be done to surrounding builds. The area was then regenerated using WorldEdit to be used once again at another time. Players had so much fun that it became a regular, yet unscheduled event on the server.
Time
Wither Fights happen a few times per day, often one did after POTW (After 4 pm EST), and some are hosted throughout the day for different time zones.
Wither World
This world is the host of all wither fights with each wither arena to be summoned into the straight-ahead arena. Players gather, collect food, and prepare for the wither fight about to happen with bows and arrows and chicken.
Currently, there is the main arena where all arenas are hosted and three side arenas where the Dry Glutch is Located (A wither Arena), and an old Sand Arena (unused).
There are also solo arenas if you want to host your own wither fight.
Arenas
Since the creation of Autcraft's new worlds in 2014, Wither Fights have been contained primarily within special arenas created by the admin where damage is either minimal or can be easily rolled back (fixed) so that the next Wither Fight can be started at a moment's notice.
Special Locations
A few Wither Fights have taken place in locations other than the designated areas. These special fights are very rare but the destruction they cause can be so much fun.
Videos
Not all Wither Fights have been recorded but AutismFather began recording quite a few of them to not only document the occasions but to also give the players the chance to see themselves on YouTube.
Along the way, many special occasions were also recorded including Wither Fights in unique locations.
The entire playlist of videos can be viewed on YouTube.
Description
The server has a lot of locations for players to explore and play in, from several different worlds to mini-games. Below is a summary of various locations on our server. For more information, click the "Locations" link on the right side of this page and then choose the location you wish to read more about.
Spawn
This is a list of all the locations at the current spawn. For the history and information about spawn, visit its wiki page. Spawn can be reached with the command /spawn
Role Play World
Autcraft's RP world is an exciting land with many places to discover.
Farms
There are many locations on Autcraft where players can kill mobs for XP or gather resources in a controlled environment.
Other Locations
Description
A house for appreciating the players who donate to the server to help keep Autcraft functioning. Want to support Autcraft as well? Learn more about Patreon Rank!
Location
The Appreciation House is currently located at Autcraft’s 5th Spawn.
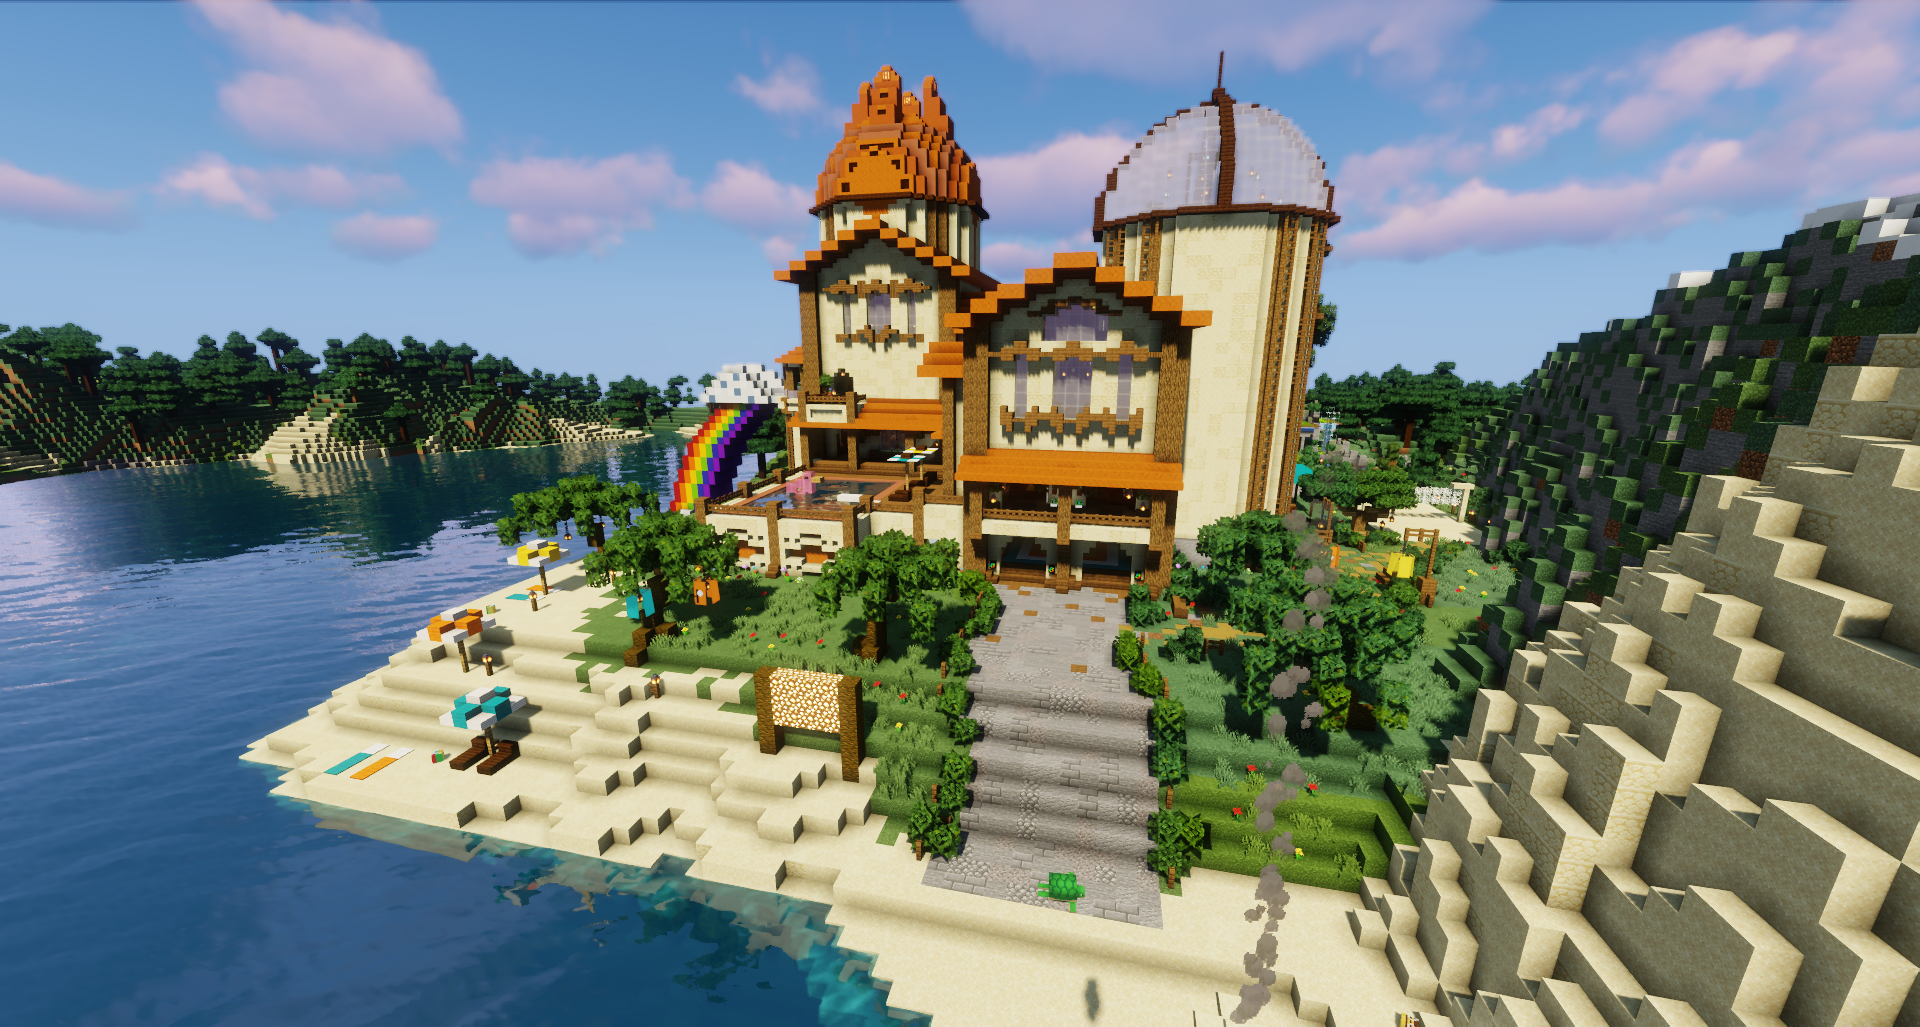
The Appreciation House
Features and Purpose
The Appreciation House has many cool builds that could be used for a variety of role play/hanging out/other communal reasons. It includes:
Future Updates
In the future, there will be updates with seasonal changes and holiday changes.
History
The Appreciation House was originally built to be exclusive for Patrons who pledge at least $10 per month, It was later decided that this build should be accessible to all players on Autcraft and is now open to everyone.
Description
Autcraft's Creative server, dubbed ACC, launched on December 18th, 2017. The Creative server is powered primarily using the PlotSquared plugin and includes WorldEdit.
The addition of Autcraft Creative also includes the introduction of the system in which the Survival and Creative servers are separate machines but tethered together to provide players a way to travel back and forth between the two without disconnecting.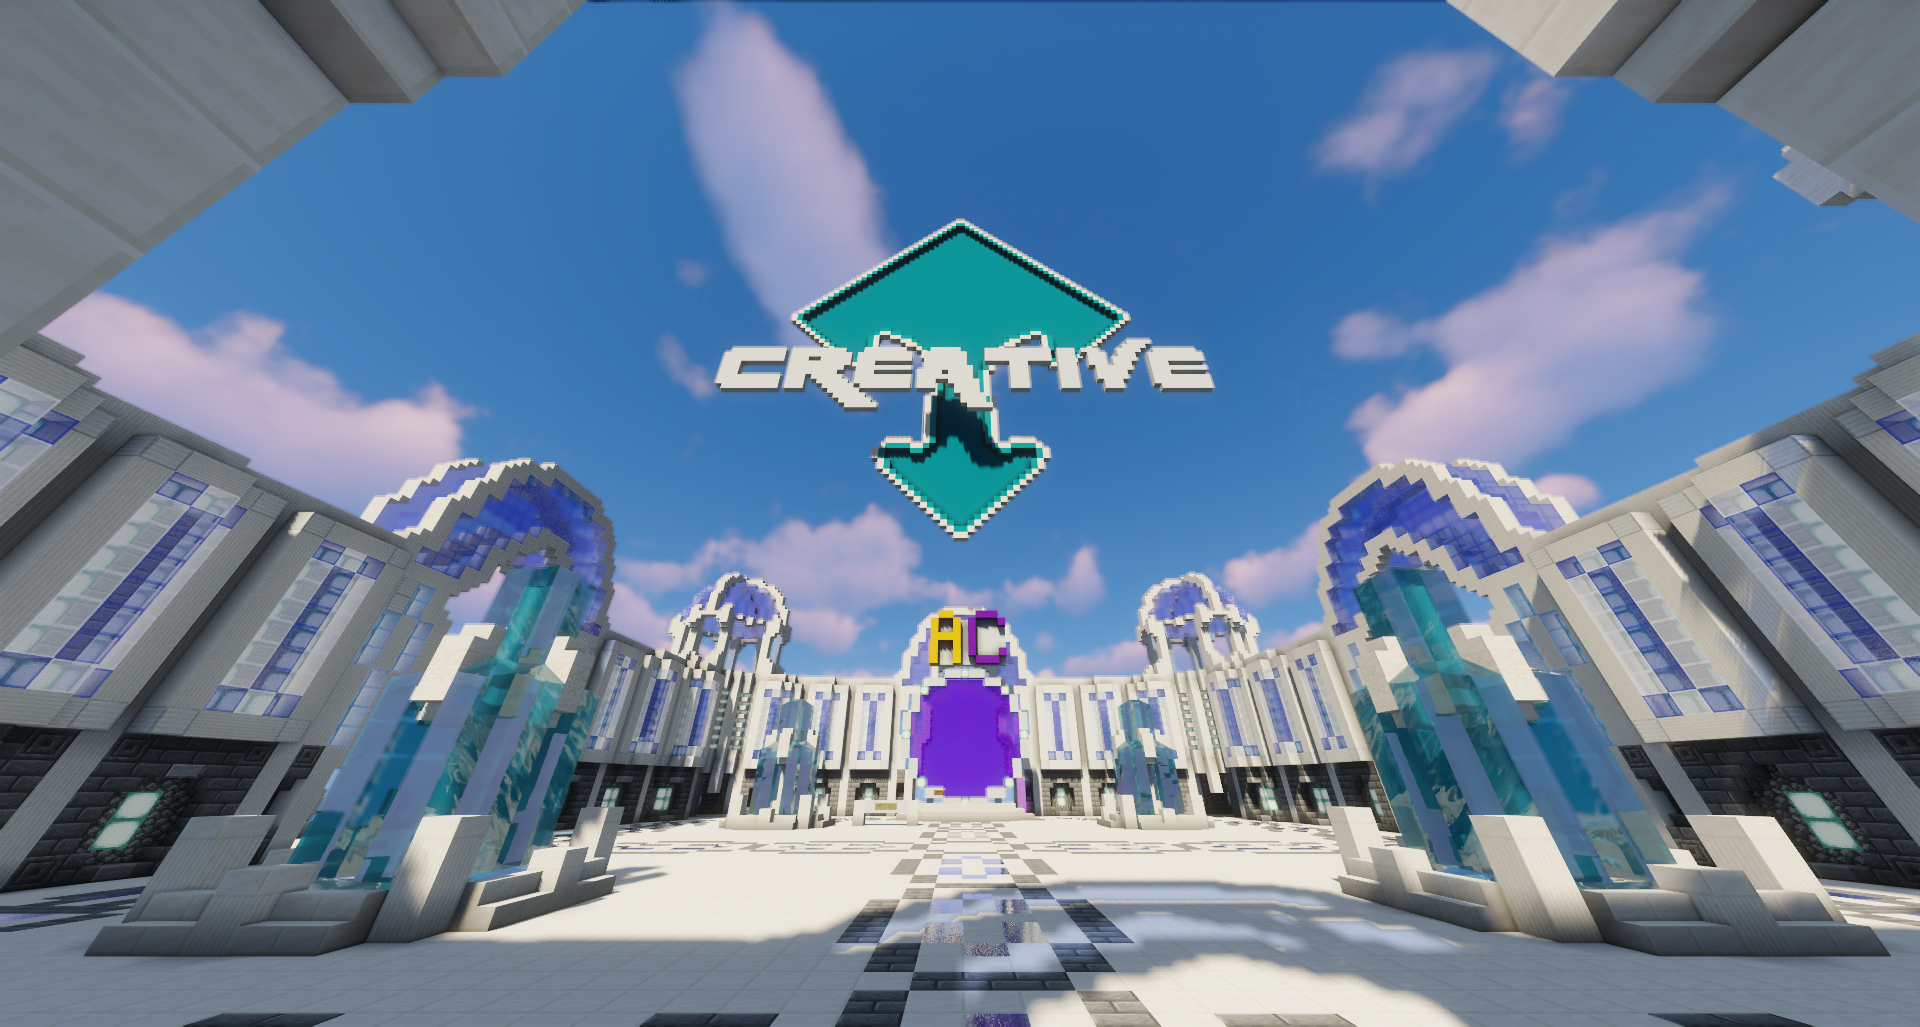
Creative Spawn
Development
The server was promised early in 2017 should AutismFather's Patreon page reach $2000/m. This milestone was reached in June 2017 and work on the server began. There were several delays however including some missing features in PlotSquared and the new Amp software, the replacement to McMyAdmin 2, was not yet complete enough to use. Also in that time, the Autcraft survival server was reaching its limits on hard drive space and required a server move, leaving the original server free to put Creative on.
Getting Started
You get access to the Creative server by first going onto Autcraft like normal and then either going through the Creative server portal or by entering the command /server creative.
When you join the ACC server, you find yourself at spawn with two books in your inventory which will explain the basics on using the server. This spawn is in a separate world from the plots world where you will have access to land and building tools.
To begin, use the command /plot auto to claim your first plot on which to build. You can also go to an empty plot and claim it by entering the command /plot claim.
Players with the Autcrafter rank get 1 plot, Iron and Gold get 2 plots, and Diamond and Patreon get 4 plots. Patreons also get access to some extra WorldEdit commands (brushes).
Extra plots and creative commands can be purchased using points at the Autcraft Shop.
Need to Know
Some commonly asked questions can be found here. Check these before asking an admin.
Description
The Christmas Village started as a small place with some builds made for the players to enjoy something during Christmas time, small houses and mini-games were constructed and added, pixel arts and lights were placed.
The Christmas Tree
Constructed at the start of the village this tree is where players meet to collect a present for Christmas, On the 25th all through the day, you can log onto Autcraft, Head to the tree, and collect a present. Generally, these presents come with new shiny!
The Christmas tree has an easter egg! Look around to find it!
Advent Calendar
Each Year there are unique pixel arts inside each day's advent, At the start of December check back each day until the 25th to see a new pixel art and a new item!
2019 Contest
In 2019 there was a Gingerbread House Contest! The only category was Most Traditional, The winner of the Most Traditional Gingerbread House Was Ezra901
2020 Contest
In 2020 there was a Snowman Building Contest! The Two categories were Most Traditional and Most Humorous
Autcraft Sword
Every Year On Christmas Day a sword is given to all who log on, this is a tradition dated back to 2013 on Autcraft's First Christmas and have Special Lore For each year.
2020 Revamps/Updates
2021 Revamps/Updates
Check back soon!
Each player may have up to three jobs at any time. Performing job actions will earn job points and in-game currency.

Available jobs are shows in the Jobs Room at /warp jobs. Right click any of the signs in the center row to view information about earning points for each job. Clicking on the top row will join a job, and the bottom row will leave a job. Players can have up to three jobs at a time and change jobs at any time. Points earned will not be lost by changing jobs, however there will be a loss of job levels.
Points are earned slowly when beginning a new job. Each job level has an XP goal to reach in order to progress. As job levels rise, the amount of points rewarded for job actions will increase. The higher a player's job level, the quicker points will be earned.
Job points can be converted into credits to use at the Autcraft Store.
Performing job actions also earns in-game currency. The amount of money earned can be seen with the commands /bal, /balance, or /money. This money can be exchanged for emeralds at The Bank at /warp shops.
Description
The first building ever made on Autcraft, the lodge was designed to be the central meeting place for players to gather and head off on adventures together. It was created with enderchests, anvils and even a hidden enchantment table for players to do virtually anything they needed while there. The lodge was created before Autcraft even opened to the public and hasn't changed much since.
Description
Lost and Found is a service for players who have lost important items. This area is located at Spawn, head straight East from the spawn platform.
How It Works
If one has found an item that does not belong to them, they may deposit it into one of the five hoppers (Fig. 2). Then the item will flow into one of two double chests which are locked to AutismFather using the Lockette plugin. To re-obtain a lost item, one must contact any online Admin or use the /modreq command. Directions are also posted on signs in the structure
History
Lost and Found was built and established by AutismFather on April 14th, 2020.
A server-created farm where players can safely collect common mob drops.
Players can use the Mob Farm at any time by typing the command /warp mobfarm
Mobs can be located by following the color-coded carpets to their spawner areas.
This build features mob spawners, piglin bartering stations, and the Nether resource shops, as well as the main entry point for the Nether Resource World.

Pass one of the piglins a gold ingot. After a few moments, the piglin will drop a trade. Possible trades include enchanted books, armor, potions, obsidian, fire charges, spectral arrows, and other nether items.

There are three shops in this hub. Shops and available items are:

Description
The initial spawn location, where you appeared when you first join the server, where you went when you typed in /spawn and where you went when you die, was inside the great Pyramid as Spawn. Inside there was some useful information to get you started, examples of several mob heads that drop throughout the server and also the portal to the Wither Arenas.
The Pyramid was not transferred to the new 1.9+ spawn because of a design philosophy around circles and a focus on making it quick to get to the world portals. The spawn point was now on a circular junction next to the world portals & minigames. The portal to the Wither Arenas was now in the world portal building.
In the 1.13 + 1.14.4 spawn, the pyramid is not present.
Description
Role Play Worlds is a place for players to explore, roleplay, and have fun. Locations in the RP world are listed below:
Locations
Other Features
Description
If you explore spawn enough, you will find some secret rooms.
Note: The locations of the rooms are not supposed to be discussed in chat, as that would ruin the adventure for others.
The shop and trade booths at /warp shops features many commonly used items to help players quickly grab items for their projects.
This area can be visited with /warp shops. These shops are run by the server. They never run out of stock. New items are occasionally added to the shops as the game updates. Most items can be purchased with emeralds, although a few items require diamonds.
This stone building can be found to the left of the path when you first visit /warp shops. Clicking on either of the two signs shown will allow you to trade in-game currency for emeralds. These emeralds may be used in the shops area, or for any other purpose the player chooses.
Description
Spawn is the first place new players see when they log on to Autcraft. It is the central location for getting to every location on Autcraft and also functions as a meeting place for many events and activities.
Current Features
Past Features
Spawn History
In 2013, Autcraft launched with just one single world. At its center was Spawn, the gateway to all other places of interest on the server.
Since that time though, the server has gone through several changes and with it, several different versions of spawn.
Spawn 1
2013 - 2014
This spawn was the first and often regarded as the player's favorite spawn. When [[AutismFather|AutismFather]] first set up the server, this was the location where the very first blocks were placed. The premise was to have a warm, inviting feeling as though you were joining a friendly neighborhood. Villager stations were set up, a lodge was situated on top of a nearby mountain where players could gather and a large 'Welcome' sign was high in the sky in the very center.
Players were encouraged to build around this central location.
Other buildings were added over time including the original "Quartz Hotel", the original sandstone pyramid, a trading station, the Autcraft railway station, and an animal zoo.
You can TP to this spawn by doing /warp spawn1
Spawn 2
2014 - 2015
In 2014 Spawn wasn't just a new location but a whole new world.
The "Lobby" world was created to house all future Spawn builds with the idea that since players could not explore, the file size of the world would never grow so large as to become corrupted by data loss.
The neighborhood feel was replaced by a single massive building with intricate details throughout. The hope was to demonstrate to players the possibilities that could be done with walls and floors beyond a basic flat surface.
The warp room and warp buttons were replaced with water portals throughout the building that players could walk into and instantly be transported to the world or mini-games of their choice.
This building was a collaboration between many admins and even had input from visitors.
Features included walls throughout displaying various ranks and top players, the addition of a birthday board, Redstone 'gate' examples, and a dragon head featuring the Dragon Eggs from past Ender Dragon Fights.
You can TP to this spawn by doing /warp spawn2
Spawn 3
2015 - 2016
Still, in the Lobby world, this new spawn returned to the village feel of the original.
Returning to this Spawn was the lodge on the mountain, the floating Welcome sign floating high in the center of the village, and the warp room.
Many new builds were carried over from the new Peaceful World into this new spawn, including the bank, post office, party room, and giant new Quartz Hotel.
Additions added since then include the library, Patreon Monument and T.A.R.D.I.S. which is now the home to our player headwalls where our ranks and P.O.T.W.
You can TP to this spawn by doing /warp spawn3
Spawn 4
Spawn of Autcraft from 2016 - 2019
With the upgrade to 1.9 and the addition of several new block types as well as the Elytra, a new spawn was introduced to feature these changes as well as to correct some issues that we had with the previous spawn.
This spawn's key feature is a reduced overall size especially directly around the primary /spawn area so that players with a render distance of 4 could find the important areas immediately.
Another key feature is the inclusion of launching platforms from several key areas allowing for players to "spread their wings" and soar around with the use of their Elytra wings.
Also, areas were consolidated, meaning that the world portals were no longer spread out in four different places. Now all world portals are in one place, all mini-games in one place, the bank and shops are in one place, and so forth.
Speaking of shops, the general store was replaced with a market in which the ShopKeeper plugin made it so that players could trade emeralds for items they wanted much as you do in vanilla Minecraft.
Buildings that returned from the previous spawn included The Lodge, The T.A.R.D.I.S., the Patreon Monument, and the Town Hall.
You can TP to the spawn by typing /warp spawn4
Spawn 5
Spawn of Autcraft from 2019 - 2022
When Autcraft updated to 1.14, the spawn was changed to fit with the underwater theme of 1.13, and with a pillager outpost to fit with 1.14. Most of the major things like the World Portals and Minigames were moved to underwater bubble-like structures. This new spawn also gave everyone the ability to use /fly, regardless of their rank.
The Lodge, Bank, Town Hall, and Shops were absent from this spawn, however returning buildings were The Patreon Monument, which was designed by MagicLentilSoup, and the mob heads building, which only contained shiny heads. The TARDIS was replaced by a portal, however, the inside remained the same. New builds included but were not limited to Patreon House, Lost and Found, a birthday island, and update-specific items (Think Pillager Outpost, Coral reefs underwater).
Throwing a trident outside of the spawn border is not recommended as sometimes they may not come back, even if it has Loyalty, resulting in you losing your trident.
In June 2020, to celebrate Pride Month, a rainbow version was created and had many different themes as you came and went.
Spawn 6
Spawn of Autcraft from 2022 - 2026
Soon after Autcraft updated to 1.18, a new spawn was created to highlight many of the new features that had been added to the game since the previous spawn was built. A perfect location was found to showcase both the new caves and cliffs, with a beautiful valley in the center.
Spawn 6 was Autcraft's largest spawn prior to Spawn 7 opening, which allowed for more exciting and complex builds. The spawn point is set on a large tower in the center of the valley, from where players can see the most commonly used locations. A brand new Transportation Station was built to house world portals and warp buttons to every world on Autcraft. The Info Center was created as a place to quickly find answers to common questions about gameplay. Lost and Found, TAO, the Jobs Centre, Birthday Island, and the Shiny Room are all located in the main area on this side of Spawn 6. The Shops and Trades area is on the other side of the mountain through a tunnel. Along the snowy peaks to the south of Spawn, the Lodge has returned, as well as the TARDIS, a boat skating rink, and other fun builds to discover.
Spawn 6 featured The Tour Coaster. This ride was developed as a way to give new players an overview of Autcraft where there isn't anyone available to provide a personal tour.
Spawn 7
Spawn of Autcraft from 2026 - present
Information coming soon!
Description
The T.A.R.D.I.S (Time and relative dimension in space), also known as a time travelers box which was stolen by the doctor and he has been running ever since. The T.A.R.D.I.S may seem to have landed on the autcraft server, but this is just a mere shell. Inside the structure, the building is much bigger on the inside (Autcraft magic, yes!).
Autcraft's TARDIS
On the Autcraft server, the structure plays a role of being the Hall of fame, the hall not only holds the lists of people with the ranks of Admin, Helper or Buddy but is also the grounds in which players gather once a week, Saturday at 9 pm GMT/4 pm EST/7 am AEST/8 am AEDT to watch the unveiling of the new POTW (Player of the week.) The TARDIS can be found on the North end of Spawn, where it crash landed into a pond. Players can also visit it with the command /warp tardis
What's inside the T.A.R.D.I.S Hall of Fame
Rank's + AF Sword's Description Inside T.A.R.D.I.S
Description
A treat at Halloween and throughout the year, Village of Boos contains a haunted house, maze, cemetery, and jump scares, among other things. Once updated each year in October, you can expect fun, spooky happenings and treats from dispensers. Players are welcome to explore the village anytime, even when events aren't running.
Special Items
Each Year you can collect a special item placed in your Build World Inventory called Autcraft ___ pumpkin. The first time this was done was in Village Of Boos 2014 but in 2017 it came back and became a yearly special item. Originally the special item was a Jack o' Lantern named "Village of Boos 2014" with the lore Happy Halloween, since 2017, each pumpkin has been named ("Autcraft {0}", year) with the lore "Happy Halloween"
2020 Updates
With the new 1.16 update and blocks, existing blocks were put out for newer spookier blocks from 1.16, Some blocks like Blackstone were used a lot and in main areas while some crimson trees were hidden in the shadows. Existing areas with paths were redone with new paths to correlate to what goes there. A New Strider race was added for players to run around a racing area against others. Ghost Busters was also added to shoot ghosts inside a haunted house. Other areas added were by the pumpkin roller coaster for the pumpkin contest.
2021 Updates
For this year's update, the VOB world area was expanded. A large Trevenant (Pokémon in the shape of a tree) was built, a Pac-Man maze created, and some new pixel art was added to the sky. The existing With Tower was also updated and now features a witch's brew area at the top.
2022 Updates
The center corn maze, which had been a staple for years at VOB, was replaced with a special dancefloor that changes with each disc played! A new Ancient City area was added, in addition to the Spectre Cafe, for some spooky role play. Existing builds were cleaned up for a fresh appearance.
Description
Autcraft has a variety of worlds for building, exploring, and mining, as well as gaming and adventuring.
Current Worlds
History
2013
Autcraft initially began with just one world (including the Nether and The End). This world had a region of space surrounding the spawn point where 2000 blocks in any direction (making it a 4,000 x 4,000 area) would be unable to spawn any hostile mobs.
The perimeter of this area had a brick wall that would keep hostile mobs out. On the other side of this wall, however, would and could spawn any mobs that regular Hard mode Minecraft could create. This quickly caused problems as the server filled up with players, most of whom desired space within the peaceful, walled, non-hostile mob spawning area. Space ran out fast.
Also, it created problems within the mob spawning mechanics of Minecraft as the game tried desperately to spawn mobs around all of the players on the server but couldn't due to the peaceful region. The resulting effect was that the game would spawn unbelievable amounts of mobs around those few players outside of the wall. Sometimes the screen would be filled with literally hundreds and hundreds of mobs.
As the end of 2013 came to an end, we began to run into data corruption issues. The server struggled to save the changes that players made to the server fast enough and thus, data was lost. This created corrupt chunks, lost items, random glitches, and more. The problem continued to worsen over time causing Autcraft to make the fateful decision to close the world forever and start anew in 2014 with the creation of two new worlds.
2014
Near the end of 2013, Autcraft announced that the single world would be closing and in January 2014, 2 brand new worlds were opened.
In addition to the creation of these worlds, a 3rd world was created called "Lobby" in which the main spawn building as well as the server's "jails" were placed. This world was locked such that no player could explore or travel beyond the building's borders in an attempt to keep the file sizes on the server as minimal as possible, reducing the chances for data corruption.
In mid 2014, yet another world was added called Resource World where players could mine for resources, chop trees, dig the ground and do as much damage to the terrain and world as they pleased. This world would be reset at the beginning of each month, replenishing the resources and providing all of the players with virtually limitless resources without having to destroy the worlds in which they lived.
Unfortunately, much like the first world, over time, there were so many players and so much activity that the server once again began to fail to save the data quickly enough, leading to data corruption. Entire areas on the server became so corrupt that simply entering those areas would crash your client, causing you to have to close the game entirely. Upon signing back in, you would appear in that area and your game would attempt to load the corrupted data and crash again, keeping your player stuck in that area until manually placed outside of that area by an administrator.
2016
Towards the end of 2015, Autcraft formulated the plan for 2016 in which there would be 4 new worlds to live in. These were:
Players were given 4 months in which to move everything they have/wish to one of these new worlds and then, the 2 old worlds would be closed on January 1st, 2016, leaving only the 4 new worlds in which to build.
Descriptio
To keep play fair for everyone on Autcraft, please follow these rules while playing minigames. Failure to do so may result in temporary or permanent loss of minigame privileges.
If you have any comments or questions about these rules, please contact a staff member.
Description:
Dropper maps are quite simple in how they are played, however they can range in difficulty from very easy to extremely difficult. The goal of each map is to reach the water at the bottom without taking any fall damage. Hit something on the way down? You will immediately be sent back to the top of the map to try again.
Available Maps
Frequently Asked Questions:
Description
Hide And Seek (Also Known as HAS) Is a minigame that is played on Autcraft.
Roles
There are 2 roles in hide and seek but multiple ways to play the role.
Strategy
There are unique ways to play each role and some strategies are pointed out in this section.
Shop
Purchase Powerups in the shops, This includes using Karma to get coins, Coins are gotten in-game or by karma when you say gg at the end of a game.
There are 3 types of powerups for both ranks and a chance changer, which can increase or decrease the chance of being a seeker or hider depending on which you choose.
Maps
There are currently 7 maps for Hide And Seek
Old Maps
These maps are no longer in use
Description
Never Have I Ever is a mini-game played on Autcraft where players jump across platforms to reach the end. NHIE Questions Must Be Family Friendly
How To Play
How you play on Autcraft is you go to the mini-game lobby, go to the pink island and select an NHIE map, and follow these directions:
House Rules
Some players play the game a bit differently and may want to make the game different, A player who wants to do so must tell the other players before doing so. Some house rules are:
Maps
Beach NHIE: A String of Ores placed down to an end platform of Granite, Water below
Rainbow NHIE: A Rainbow line on each dot lining up to a cloud at the end. Obsidian, Crying Obsidian, and Black Concrete below with bubble columns to get back up.
Description
King Of The Ladder is a minigame where players compete to be at the top of the ladder by having powerups like snowballs and a sword. First-person to the top wins/person who stays the longest wins, house's rules.
Powerups/Items
In all 3 maps, there is a certain parkour point where you have to do tough parkour to reach the special item area, this area is located mostly centrally but some vary. These items are renewed to get every 10 mins
Maps
Description
Mob Arena is a single-player or multiple player minigame where you all team up and survives again the mob attacks. At each stage, the mobs get harder and harder and you are tasked with killing them and surviving with special kits.
Kits
These kits give you specific items to help you defeat/survive the mobs, Not all the maps have the same kits so prepare for a different kit
Maps
Maps are the places you fight mobs and try not to die to the stages
Description
Paintball is a face-paced game mode with snowballs (Paintballs) and powerups like the airstrike.
Maps
Maps are locations where players can play and have fun in the game of paintball.
Happy Hour
Happy hour is an hour when every powerup item is free, usually, it is chaotic with exploding snowballs, snowball launchers, and airstrikes. When a happy hour is started an admin will broadcast the start of it and a timer in the minigame will show when it ends.
How to Play
First you either type /spawn or do /warp minigame and go to the mini-game room, go down into the room, and click the button called Paintball, Once in, type /pb join and wait 5 seconds. Then you are ready to play.
Cash
In Paintball you gain a currency used to buy paintballs, powerups, and other abilities such as turrets, you gain cash by playing, eliminating players, and winning games.
Ranks
In paintball there are multiple ranks, the top rank is master chief, you can see the ranks in the lobby by the armor on each player, the top rank having Lime and Green Leather Armor. Do /pb ranks in the lobby to see how many points till your next rank.
Points
Used to gather up and rank up you can check your points by looking on the right of your screen and looking at points. The top-ranked player (IceAngels) is at 86017 points! That's a lot of points! Earn points by defeating enemies and by winning. Similar to cash but permanent and not spendable for powerups.
Teams
There are 3 teams in paintball, one of them is the Blue Team, one is the Red Team, and one is the Spectating team, you can specifically join any of these teams by doing: /pb red /pb blue /pb spec.
Powerups
Description
Parkour in Minecraft is defined as jumping from block to block to reach the end goal, this may be a final block, a land of riches, or just the top of a mountain.
Autcraft's Parkour
Autcraft currently has three parkour options. Dungeon, 3 Levels, and Four Elements.
Description
Accessibility settings allow players to customize aspects of the game to make it easier to work with their specific wants and needs. These can range from visual and audio changes, to specific gameplay features.
How to get there
These settings can be found in the Minecraft game menu. Click escape, the choose Options, then Accessibility Settings, as shown below

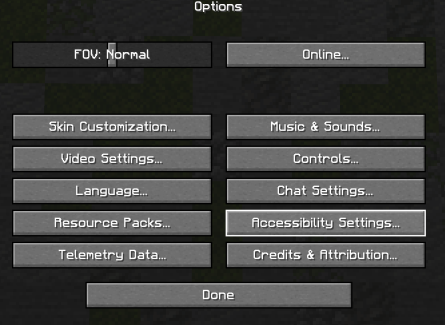
Accessibility settings

On  Off
Off 
![]()
![]()
![]()
![]()
![]()
![]()

Green overlay
High Low
A value of zero will have no glint
NOTE: The AI is for entertainment purposes only. It will get some information wrong. This AI uses information it finds online and it is not always accurate. Just have fun!
Artificial intelligence, or AI, is the ability of a computer to complete tasks that are usually done by humans. Our AI has the ability to converse with players through a question and answer format.
AutismFather has integrated the OpenAI API into our chat plugin. Each time a player joins the AI channel, it silently sends a greeting to the OpenAI system, along with a set of instructions, such as the current Minecraft version of the server, the server address, the year it was started, the ranks we offer, and more. This tells the AI to believe that it is the Autcraft Minecraft server and that the server is talking with the player. All questions will be answered from the perspective of the actual server.
To begin, simply type /chan join AI
Each time a question is asked, the AI will almost instantaneously return an answer.
Our AI is instructed to keep responses safe for children of all ages. All messages are sent from "Player." In other words, the OpenAI system never knows which player it is talking to or receives any data about those players. Once a conversation is closed, all of that information is destroyed. The AI will not remember any of that conversation the next time the player joins the channel.
Each player's conversation is private between the player and the AI. Even if multiple players are in the channel at the same time, each player will only see their questions and answers and not that of any other channel member.
Finally, these conversations, like all of Autcraft, are monitored in real time and logged by Autcraft staff to make sure nothing inappropriate or dangerous is ever presented to the players.
Due to the fact that the OpenAI system only knows what it has been told by the team that created it, its information is limited and often wrong. This is especially true when it comes to questions about Autcraft. It has heard of our server and knows some basic information, but it does not know our server rules or commands. The AI will respond with general Minecraft server information, but it does not have any command, plug-in, or other information specific to Autcraft. Please continue to ask staff any questions about the server. The AI is meant to be entertainment, not a source of information.
It is for this reason that we've added a disclaimer to the start of each conversation reminding players that this is for entertainment purposes and not to be taken seriously. This is a toy.
OpenAI is not a free system. It costs real money. Players are limited to 20 interactions per restart period (12 hours). This is to help keep costs down, but also ensure that players aren't spending all of their time interacting with the AI instead of real people on the server.
These are questions are based on interactions we have seen with the Autcraft AI:
Bessie
Description
"Bessie" is the name affectionately given to the actual hardware on which the Minecraft server is operating.
About
Although Autcraft has transitioned through several hosting companies and even multiple servers within the same hosting companies, the personification of Bessie never changes.
When lag gets too bad or something simply goes wrong without explanation, players will often start talking to Bessie, as if pleading to behave or to work properly.
Bessie is considered to be a her.
Currently '''Bessie''' is hosted at EZP.
Are you bored? Try one of these!
Description
This is a list of things to try in Minecraft when you are bored and need something to do.
Broadcast
Description
Broadcast is a command on the server which creates a bold, light green message into chat that no player can ignore. These are often used for making announcements but sometimes used to deliver important reminders or to disrupt/derail inappropriate conversations taking place at the time.
Who is Broadcast?
The /broadcast command is only accessible to players with the rank of Admin. No other ranks have access.
Many of the players like to try and guess which admin is issuing the commands once they see Broadcast appear.
Some players even like to pretend that Broadcast is "alive" or "sentient," much like Bessie, the actual server itself. Some players imagine that Broadcast and Bessie are one and the same while others believe that they are separate beings. Some players call broadcast different names such as Breadcatz or Baconcast.
The Cursed Admins
Description
The Cursed Admins were introduced on Autcraft's 7th birthday, June 23, 2020. Teasers leading up to the day included darkened screenshots of the Cursed Admins with the number 7, the letters AC and then a mirror image of the number and letters beside it. The 7, meaning the 7th birthday as well as the 7 Cursed Admins, and the AC meaning Autcraft while the CA meaning Cursed Admins. Included was a new logo that was flipped horizontally, along with the 7 over it, and glitched or distorted.
Introduction
Earlier in the week, the Do Not Press button at Spawn asked the question "Have you ever wondered who has been sending the Wither armies?"
As three Wither Fights took place on the 7th birthday, broadcast told the story of how the armies came, then the kings, then the stronger kings, who were the generals, and finally the bosses who sent them, the Cursed Admins. These Cursed Admins are from another dimension, admins of another server, mirrored to Autcraft, who have crossed over to take over Autcraft. Autcraft's only protection being the players.
The Cursed Admins
The Cursed Admins, being server admins, each have a unique particle effect, base health and strength, and admin-like special ability.
Drops
Each Cursed Admin drops its Cursed Head, some rotten flesh, and occasionally their sword, or boots, or the item in their off-hand. Not getting the head? The heads dropping arent a 100% and sometimes you may not get them, along with that some admins like Cursed Farockz have explosive damage attached to their abilities and may destroy the item. Subsequently, after it drops, a wither might also blow up the Cursed Admin Head.
Cursed Admin Heads
Cursed Admin Heads are mob heads dropped from Cursed Admins. To date, there have been only 12 available Cursed Admin heads.
History
The Cursed Admins were Released on June 23rd, 2020 as said above. The addition was first met with the regular admin heads for June (PRIDE Heads) and later added the special Cursed Admin Heads. The original admins released with the cursed admins were: Saidy, JustBlue333, Jasdin, bb1201, AutismFather, Farockz, and AutismPastaLover. The first Cursed Admin Removed was AutismPastaLover for a short break between summer and fall and returning to a cursed admin boss around October-November 2020. The First New Cursed Admin was Buddy4999 around December 2020. Cursed AutismPastaLover, Cursed bb1201, Cursed Buddy4999, Cursed Jasdin, and Cursed JustBlue last appeared on 4/17/2021.
Head Of The Month
Description
The Head Of The Month is a monthly perk to being a Patreon supporter for the server at the $10/month level. Each month a special head is selected and given to players with the Patreon rank on the server. These heads are exclusive to members with the Patreon Rank.
How to get the HOTM
History
Hotlines
Description
Sometimes players feel overwhelmed, sad, angry, depressed, afraid and even suicidal. In these situations, we'll always do our best to be available to talk. But sometimes more help is required.
Compiled below is a list of phone numbers and people to contact around the world that are available at any time.
If you feel like you really need to talk to someone and it has to be right now, please look through this page and talk to someone right away.
Australia
Belgium
Canada
China
Germany
Hong Kong Special Adminstrative Region, China
Northern Ireland
Republic of Ireland
Japan
New Zealand
Papua New Guinea
Samoa
Tonga
United Kingdom
United States of America
Lag
Description
Lag is usually considered to be choppiness or stuttering or when items don't break/appear when they should in game. This is generally an over simplification of many possible factors and symptoms.
Types of Lag
What can I do?
Log out, close your game completely, then re-open it and log back into Autcraft, as this may help. Also, restart your router (if applicable.)
For the future, install the Optifine mod to choose Minecraft settings that will help reduce the resources your computer needs to run your game. Optifine should only be downloaded at Optifine.net and includes a self-installer for Windows and Mac. No mod loader is needed to use Optifine, at this time.
Shiny Heads
Description
Shiny Heads, based on Shiny Pokemon, are heads with a different color. When they are dropped, you will hear a firework, see Villager Happy particles, and you will get an in-game message. They were released on August 21st, 2017, the original being Shiny Creeper.
Discovery
Shinies are either discovered by players or released for events, such as our Christmas event.
Many shinies were discovered during 2020's Shiny Month In May!
Shinies are very hard to get, but you can increase your luck by adding Looting III to your sword.
Spawn Shiny Room
To see the complete list of shinies discovered, head to the shiny room at spawn
Shiny Collections
Many players on Autcraft have collections of their shiny heads, some like to store them all in one spot and show it off to others on their achievement and great time spent collecting their shinies.
Shiny Chances
Currently, Shiny Chances are not publicly available but do make it known that some mobs have a higher percentage on the shiny.
The way shinies work is the mob gets the random chance to drop ahead, if it does it rolls a second chance to see if it gets a shiny, if it lands on a normal head, it gets a normal head, if it lands on a shiny, you get a shiny, No one knows the exact values so it is quite hard to predict.
Shiny Chances Increase
There have been several instances where shiny chances were increased, some permanent, some were event-themed. These are Fun but Rare events and asking for more will lead to less of them happening. Most notably:
The List Of Current Shinies
Note: This list is not kept up to date often and may be incorrect, it is in chronological order with possible minor errors


